Another reboot has booted up and the final verdict is still up in the air. But while we’re waiting to see where the reviews eventually land, AirBrush can help you prep an edit inspired by this newest TV offering. Bel-Air is the more realistic version of the nineties comedy sitcom. Actual punches are thrown and the sense of drama is played up for a complete 180-turn from the light-hearted show we all know. So in tribute to this television legacy, we have a fresh Bel-Air edit to get you started.
Step 1: Background
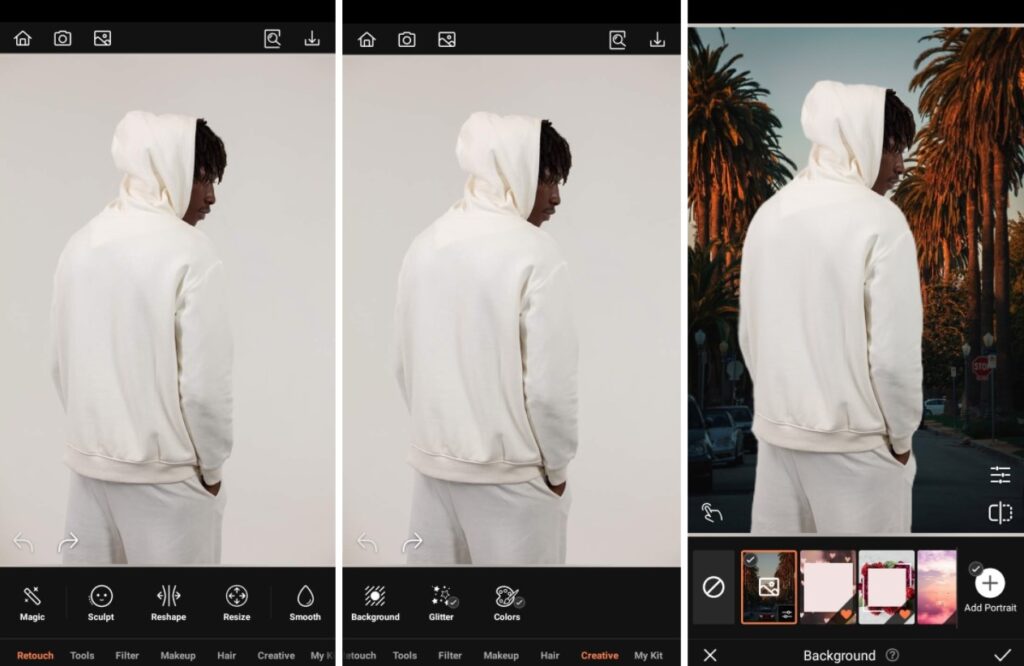
This tool can take you out Bel-Air even if you’ve been born and raised in West Philly, “one little fight” is not necessary. You can choose from AirBrush’s array of backgrounds if any of them scream Bel-Air to you. Alternatively, you can upload your own Background, a literal picture of LA if you wanted to get the best of this Bel-Air edit.
- Go to the Creative Tab on the Main menu.
- Select Background
- Choose any of the existing backgrounds or upload your own.
- Adjust the scale of the subject by pinching in and expanding out.
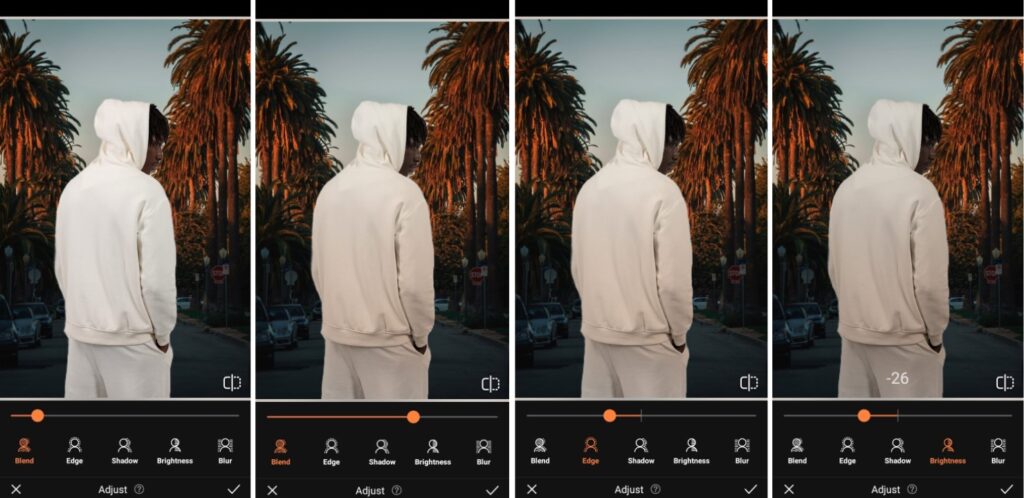
- Use featurettes like Blend, Edge, Brightness, Blur or Eraser to perfect your edit.
- Tap the checkmark to save your edit
Step 2: Bokeh
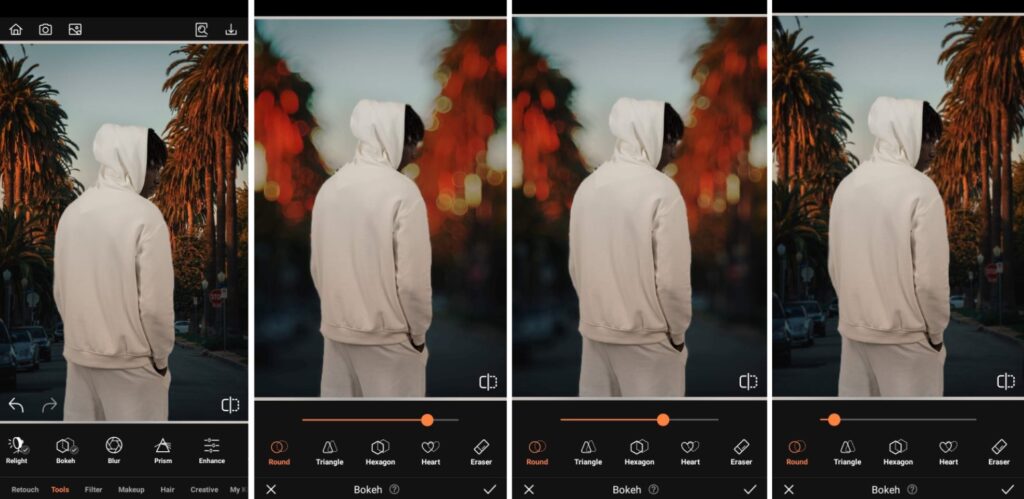
Next, remember that both The Fresh Prince and the new Bel-Air are centered around Will Smith’s (the character) development as he finds himself in an alien environment. Use the Bokeh tool to softly blur the background of your Bel-Air edit to keep the focus on the main character.
- Go to the Tools Tab on the Main menu.
- Select Bokeh and choose the shape of Bokeh you prefer (perhaps the heart-shaped one?)
- Toggle the intensity of the effect by using the slide bar.
- Correct any over-application of the effect with the Eraser tool.
- Tap the checkmark to save your edit
Step 3: Filter
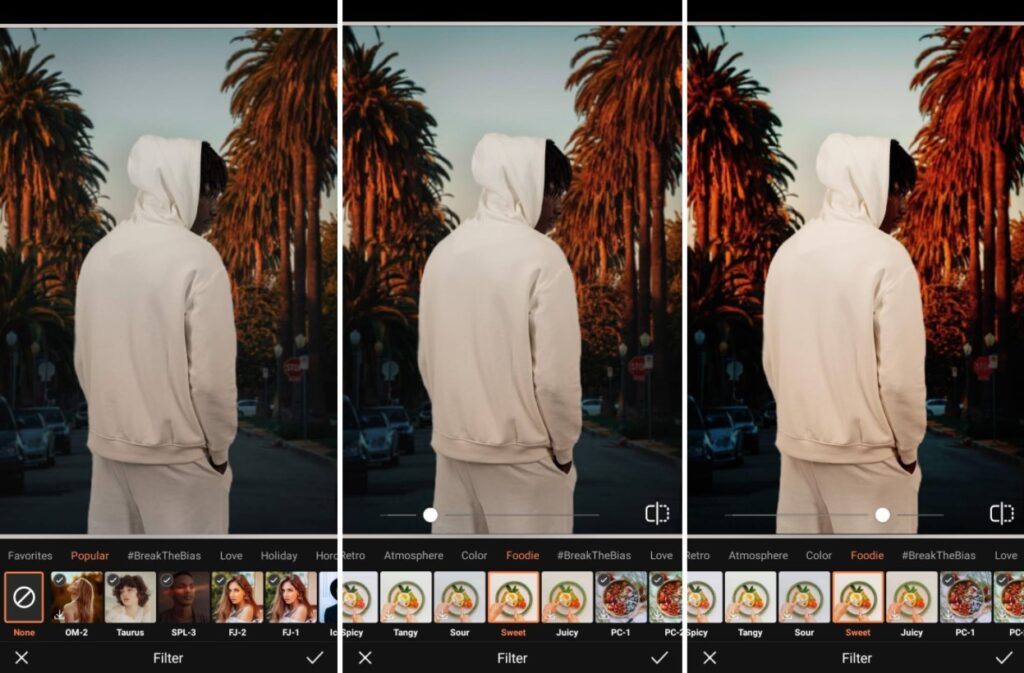
Filters are the best way to finish up any AirBrush edit and that goes for a Bel-Air edit as well. AirBrush’s has a wide selection of Filters, so you’re sure to find one that shows up the sunny brightness of California but somber realness of the reboot. Try any one out and adjust the levels to suit you. That’s the last step!
- Go to the Filters Tab on the Main menu.
- Scroll through the Filters selection. We’re using FJ-1here. Narrow down your choices by choosing a category.
- Adjust the intensity of the effect by using the slide bar.
- Tap the checkmark to save your edit

Just three steps to jump in on this Bel-Air edit trend. Break out AirBrush, the easy photo editor, to easily apply the tools that’ll have you posting in no time. Once you post, tag your photos with #AirBrushApp so we can find them. Then follow us over on Instagram @AirBrushOfficial for our latest tips and tricks!
- How to Keep Photobombers out of your Photos - 03/11/2023
- 7 AirBrush Editing Tools for Influencers to Easily Enhance Their Photos - 03/11/2023
- 7 Tools for Easy Photo Edits with AirBrush - 03/11/2023


- How to Keep Photobombers out of your Photos - 03/11/2023
- 7 AirBrush Editing Tools for Influencers to Easily Enhance Their Photos - 03/11/2023
- 7 Tools for Easy Photo Edits with AirBrush - 03/11/2023