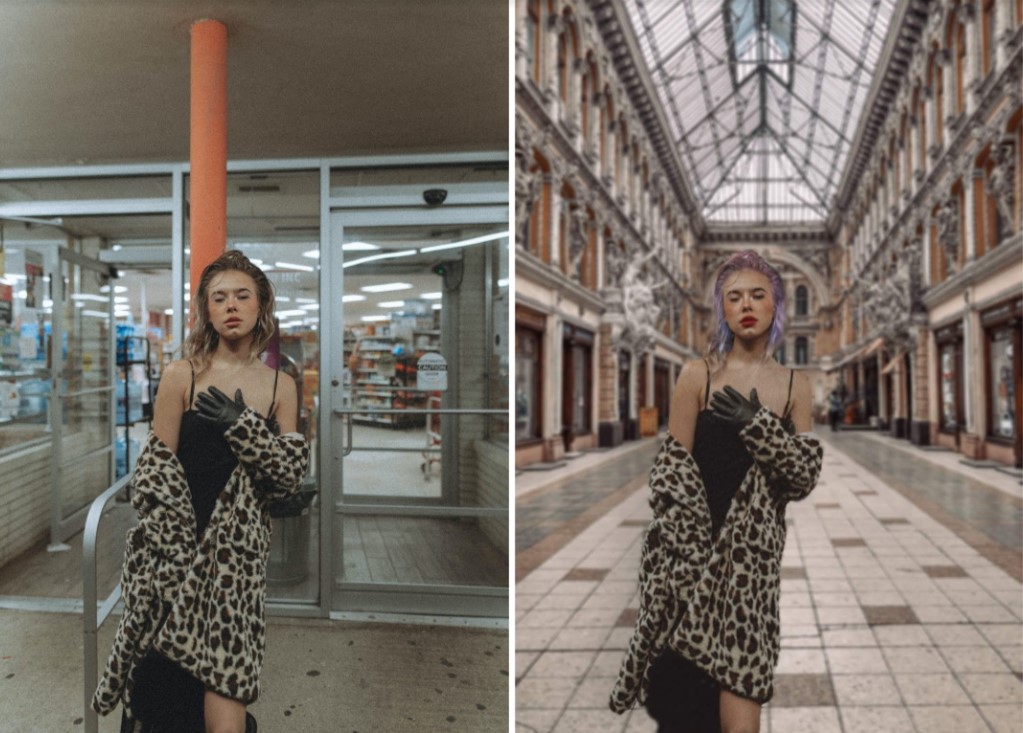
Ahhhh! It’s that special time of year when we’re expected to go over the top to show our loved ones just how much they mean to us. Grand gestures and generous gifts are all par for the course, but when it comes to giving a token that’s truly from the heart, nothing says “I love you” like a photo captured and edited specifically for your one-and-only. That’s why AirBrush has prepared this tutorial for a V-Day edit that’s sure to be noticed. Keep reading to see how you too can create your very own simply sweet Valentine’s Day edit.
Background
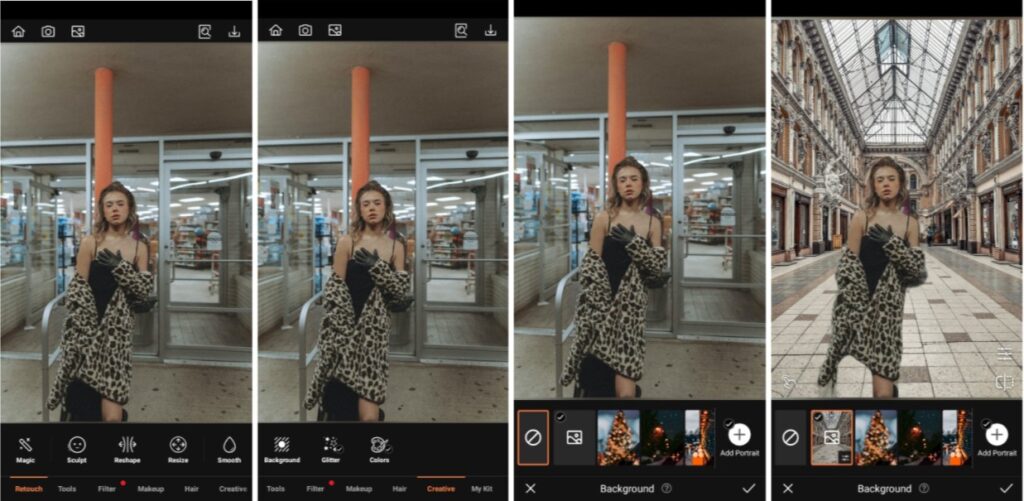
Every V-Day edit calls for as many romantic elements as possible. And the first one you should take care of is the Background. Our Background tool comes with its own selection, but if you’ve got something specific in mind, you can upload any photo you like using our customizable feature to create the edit of your dreams.
- Go to the Creative Tab on the Main menu.
- Select Background
- Choose any of the existing backgrounds or upload your own.
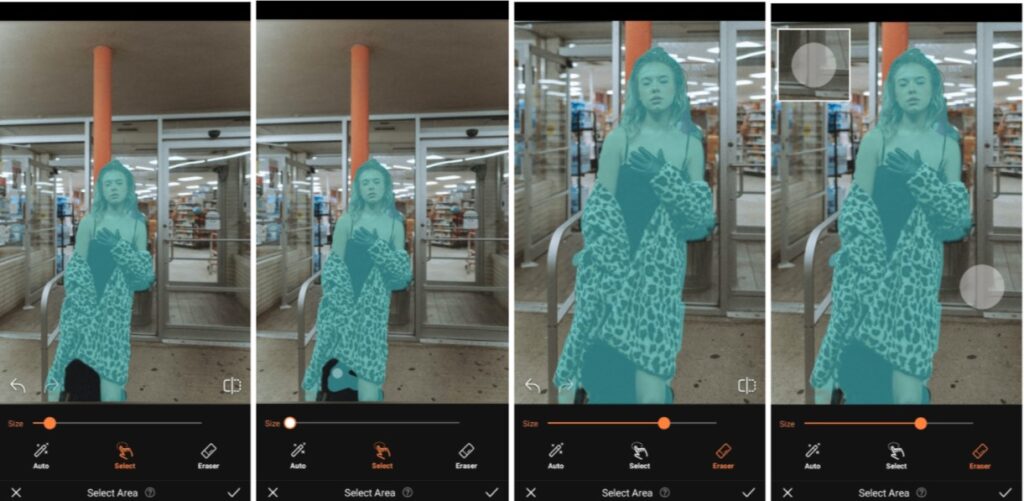
- Adjust the scale of the subject by pinching in and expanding out.
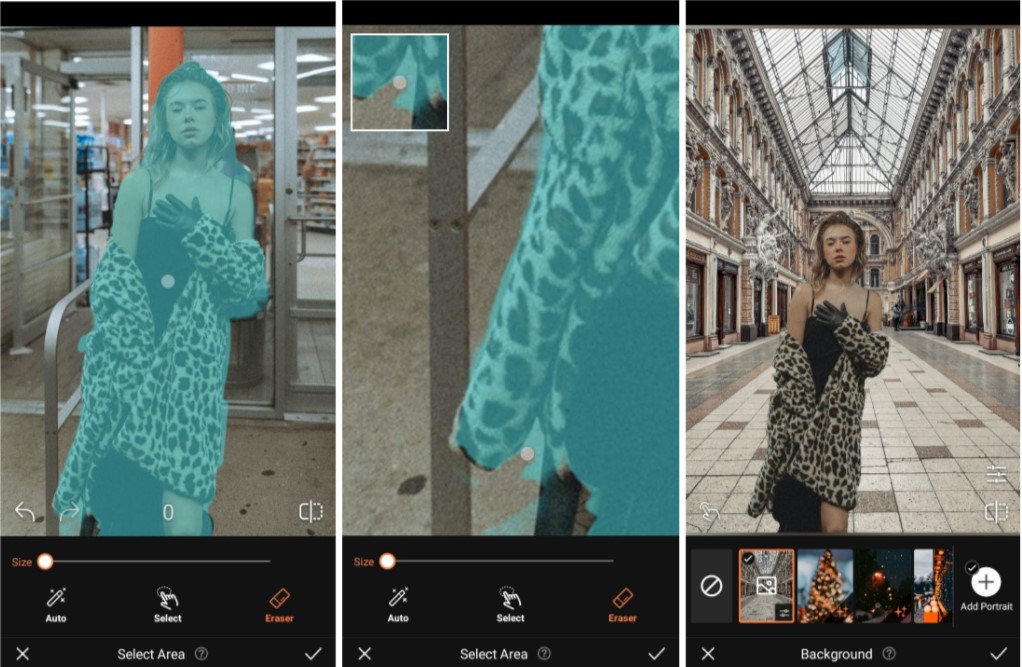
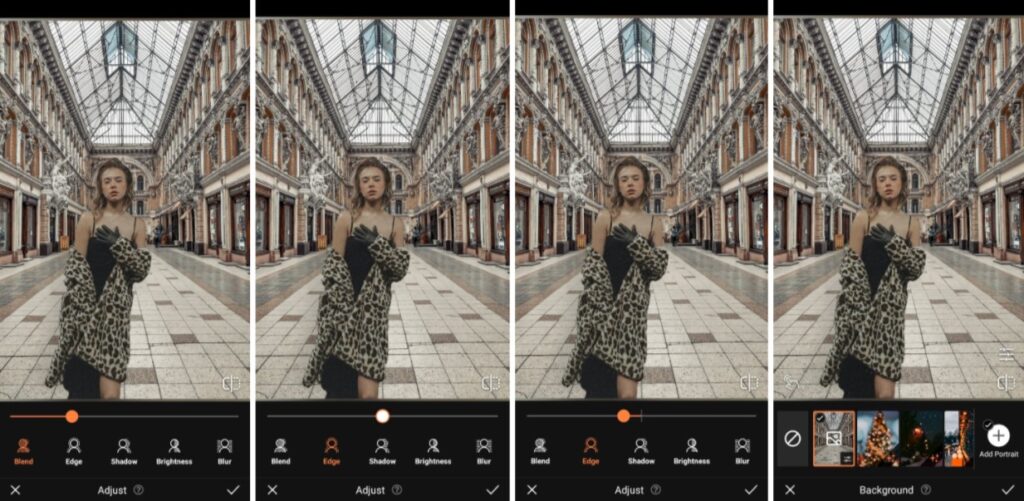
- Use featurettes like Blend, Edge, Brightness, Blur or Eraser to perfect your edit.
- Tap the check mark to save your edit
Bokeh
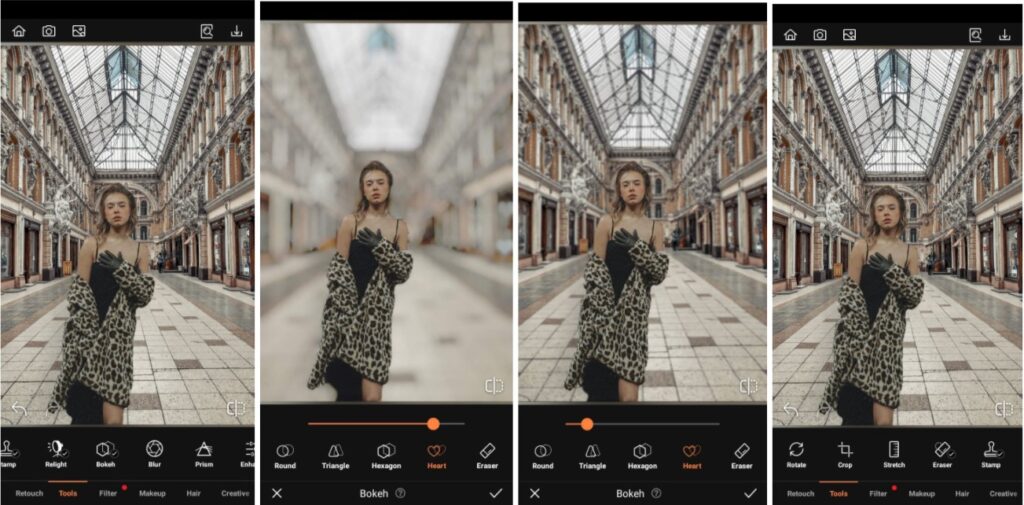
To place emphasis on the romantic subject of your photo, apply Bokeh to get that pro-level blurring effect. This effect is perfect for a V-Day edit because it gives a sense of intimacy and coziness. That’s because everything else in the shot is literally blurred to oblivion.
- Go to the Tools Tab on the Main menu.
- Select Bokeh and choose the shape of Bokeh you prefer (perhaps the heart shaped one?)
- Toggle the intensity of the effect by using the slide bar.
- Correct any over application of the effect with the Eraser tool.
- Tap the check mark to save your edit
Makeup
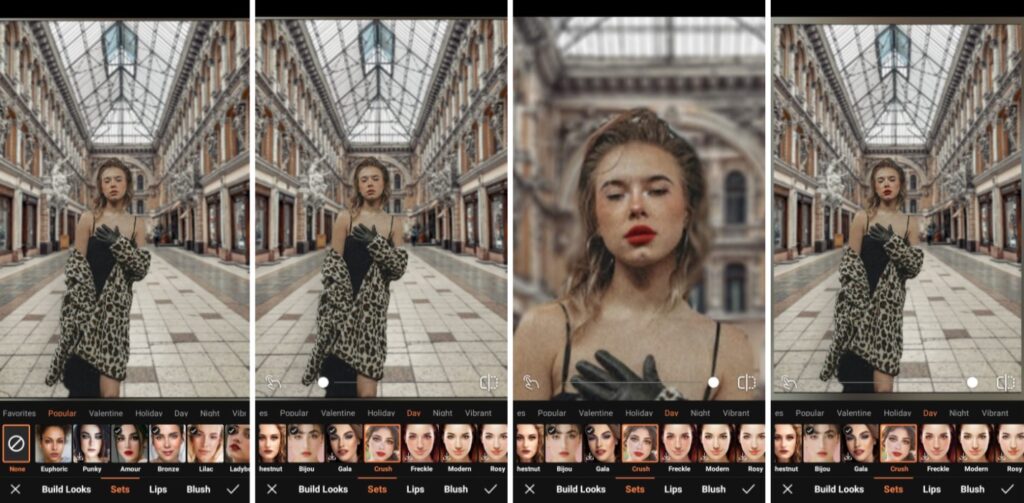
Though a natural look is lovely, Makeup can convey so much more. And with this V-Day edit, we want to spread the love and romance around early. So choose one of our Makeup that conveys that for you. The best part is that there is no need for products or brushes. It’s all done in one tap!
- Go to the Makeup Tab on the Main menu.
- Select Crush look under the Day category.
- Toggle the intensity of the Makeup look by using the slide bar.
- Tap the checkmark to save your edit
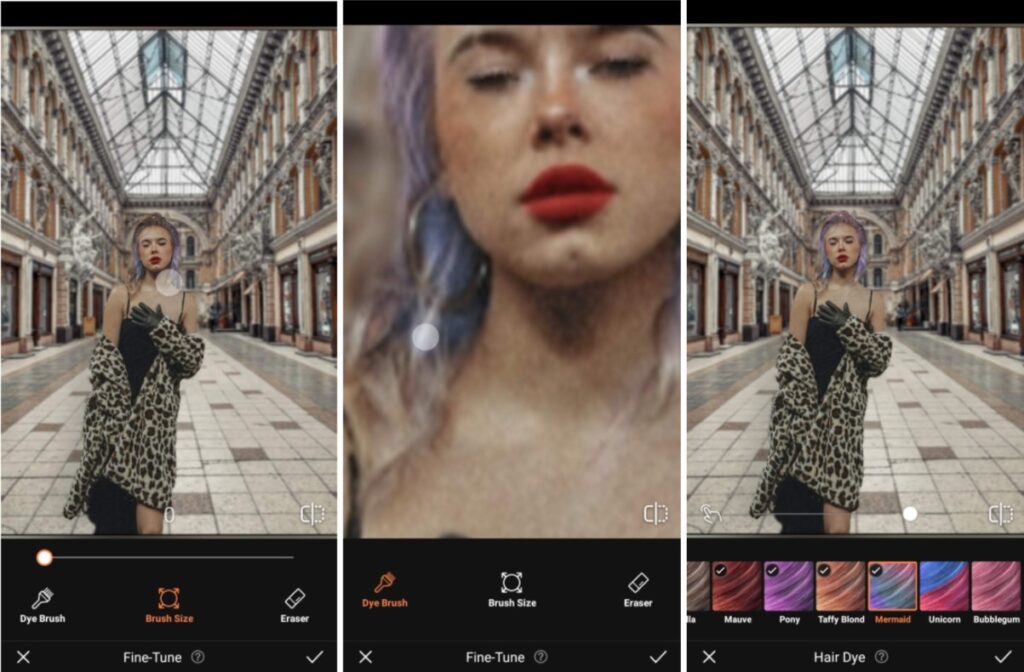
Hair Dye
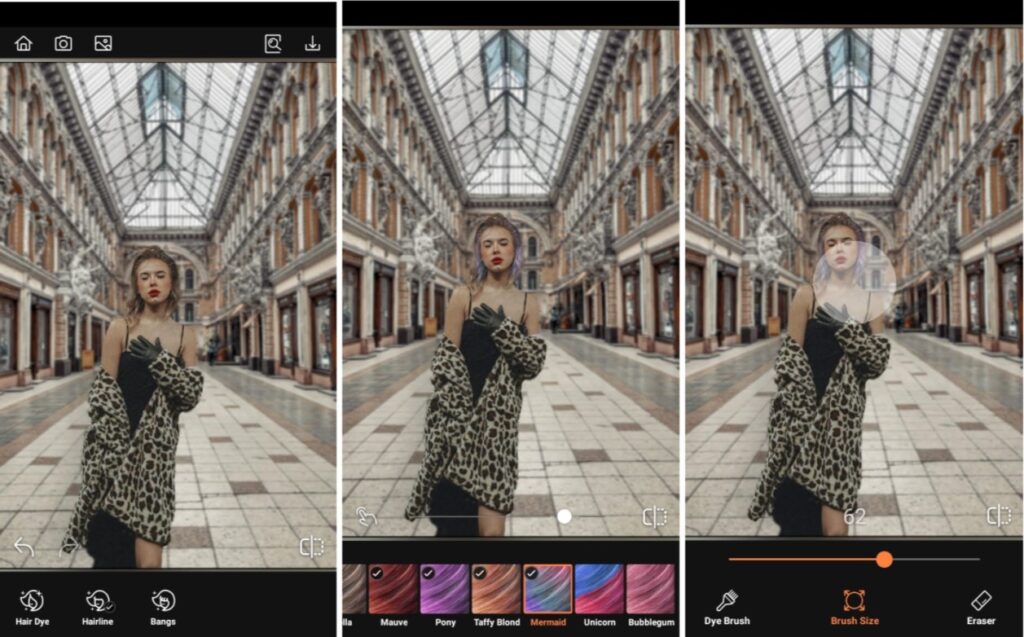
Ok! We’re talking about romantic elements for your V-Day edit and another way to get that vibe is with a new hair color. You might think pink but AirBrush’s Hair Dye tool offers purple, coral and mauve just to name a few. Romance in a color is subjective, so if you want to go for something non-traditional, we’re here for it.
- Go to the Hair Tab on the Main menu.
- Select Hair Dye feature
- Scroll through and select a romantic color, perhaps Pony or Mermaid
- Toggle the intensity of the effect by using the slide bar.
- Perfect the edit with the Dye Brush and Eraser tool.
- Tap the checkmark to save your edit
Filter
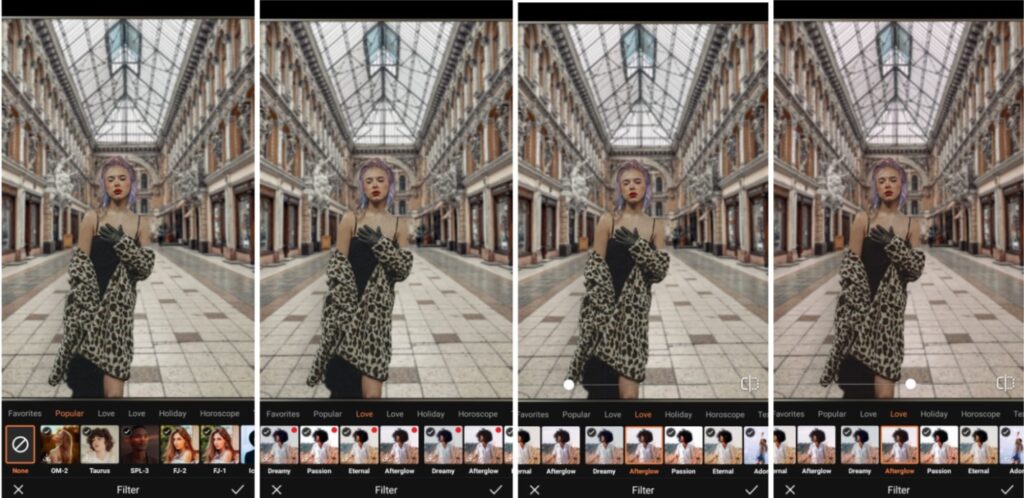
And the perfect finish is always handy with a Filter. AirBrush has a lot of options, but for this Valentine’s, we’ve got some Filters for the occasion. Your V-Day edit will be complete and collecting more heart emojis than you can shake a stick at!
- Go to the Filter Tab on the Main menu.
- Go to the Love category to see our Valentines’ Filters
- Scroll through and select your preferred filter. We used Afterglow here
- Toggle the intensity of the effect by using the slide bar.
- Tap the checkmark to save your edit
And just like that, you’ve got your first V-Day edit sorted. Once you’re ready to edit, use AirBrush, the easy photo editor, to start spreading the love around early this Valentines’ season. When you’re done editing, use #AirBrushApp to tag your photos so we can find them. Then follow us on Instagram @AirBrushOfficial for our latest tips, tricks and hacks!
- How to Keep Photobombers out of your Photos - 03/11/2023
- 7 AirBrush Editing Tools for Influencers to Easily Enhance Their Photos - 03/11/2023
- 7 Tools for Easy Photo Edits with AirBrush - 03/11/2023


- How to Keep Photobombers out of your Photos - 03/11/2023
- 7 AirBrush Editing Tools for Influencers to Easily Enhance Their Photos - 03/11/2023
- 7 Tools for Easy Photo Edits with AirBrush - 03/11/2023