Orange can be iffy and black is so predictable. Red, however, always makes a statement. This spooky season break out of all your pumpkin spice selfies and take a walk on the wild side with AirBrush. Red & wild. Get spooky with Scarlett, our drop dead gorgeous filter collection that takes your pics from fall bliss to red-y for Halloween.
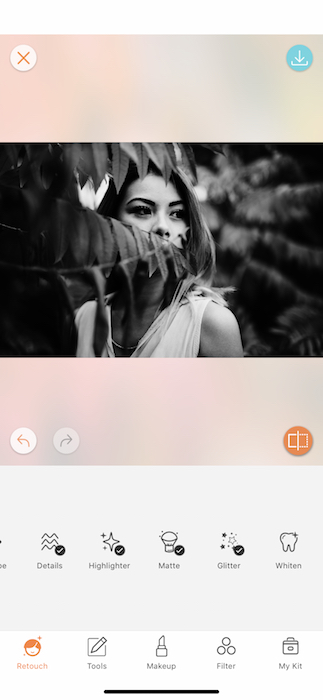
The basics
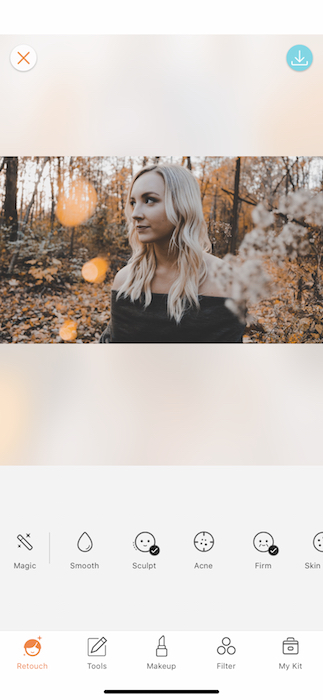
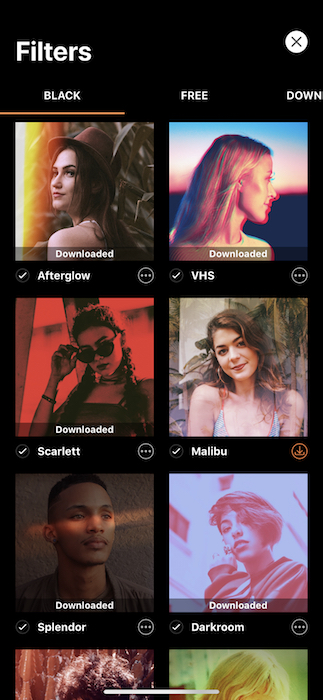
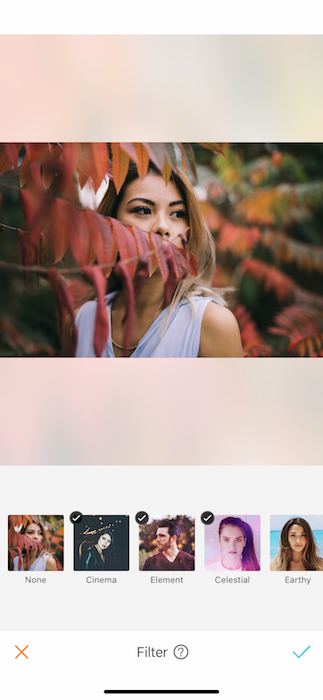
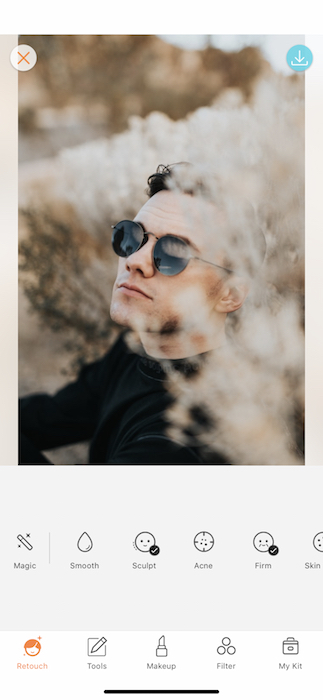
When you upload your chosen image to the Airbrush app you’ll find a main toolbar. Second to the right is Filter. There you’ll find a whole world of amazing filters ready to take your insta game to the next level. To find our Scarlett filter collection swipe all the way to the right where you’ll find the Get More button. When you tap the plus sign you’ll be taken to the filter market. There you’ll see all our newest and classic filter collections which you can easily download by tapping the orange icon on the bottom right of each thumbnail.
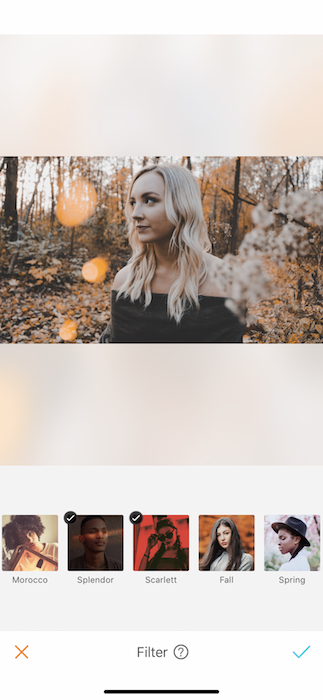
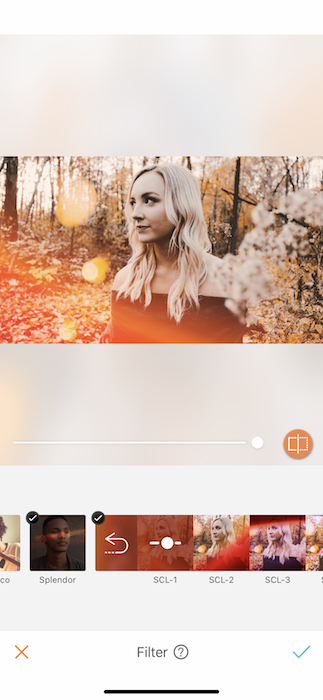
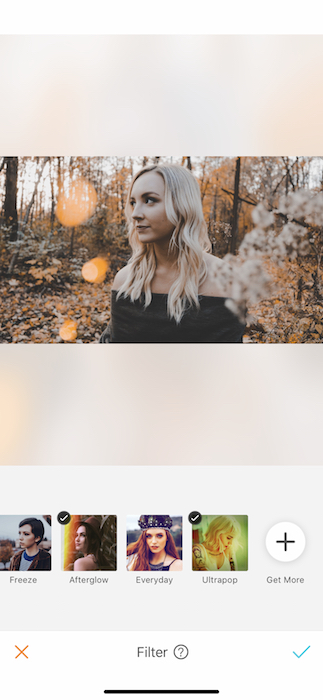
Once you’ve downloaded the Scarlett filter collection, you’ll find 5 chilling red filters perfect for a luxury spooky selfie. That’s right. Pumpkins and spider webs? Tacky. Ugly. Gross. Red lens flares and chilly color adjustments? Classy Halloween AF.
Go ahead and tap on each filter in the series until you find the right one. The quickest Halloween filter fix is going to be SCL-5. It’s a one-stop-shop for a spooky selfie that says “I definitely paid more than $9.99 for this look”.

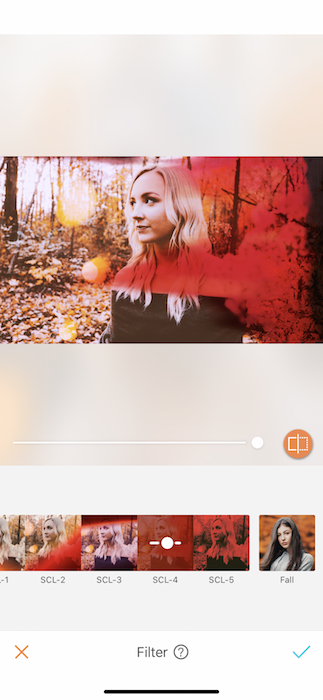
Look at that! From peaceful in the forest to RUN, GIRL, RUN! All with the tap of a finger. This was the beginner course. Let’s get ready for some filter layering!
Two’s always better than one
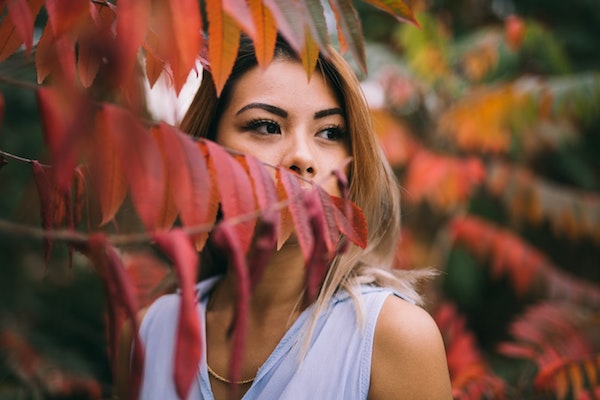
We all remember that incredible Kim Kardashian gif with her peeking out of the bushes and laughing. Surely working on some prank as those sisters love to do. (And, by the way, did you know you can look just like the Kardashian sisters with these features?) Well now we’re going to take this seemingly playful hiding in the bushes selfie and turn it into RUN, GIRL, RUN! once again.
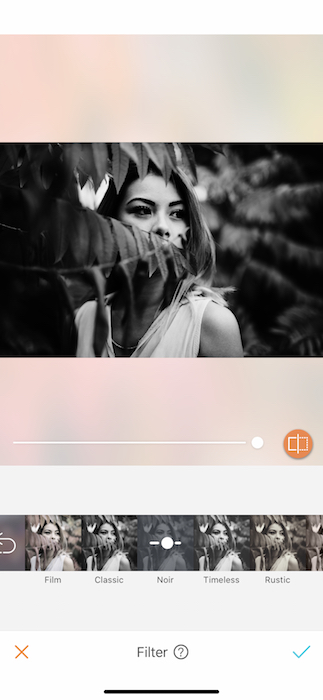
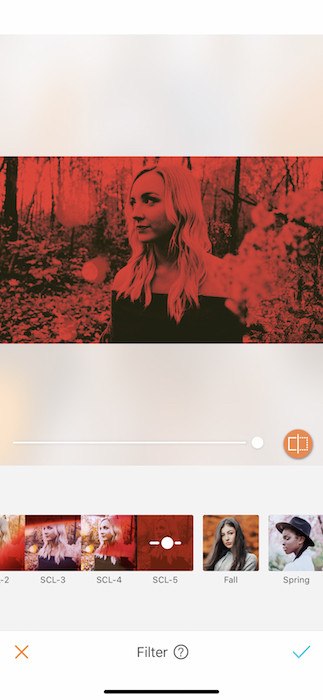
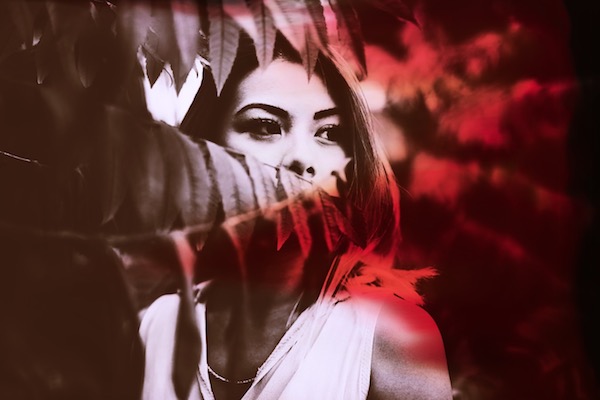
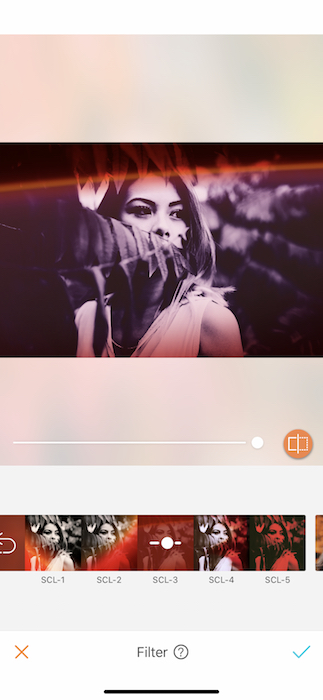
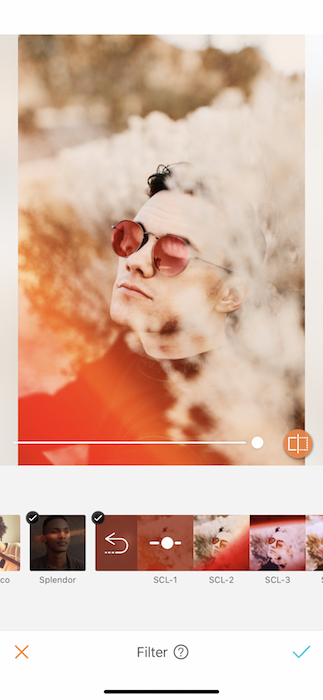
As you can see our selected picture already has a lot of red tones in it. By using this image we run the risk of it looking more cozy fall vibes rather than I’m spooky and pretty and you should be scared. In order to make sure we send chills down all the spines, we’re going to take a trip to B&W town. Going black & white with your selfie before adding any of our color flare filters helps make sure that filter doesn’t get lost in your already colorful image. Today we’re going to team up with Noir from the B&W filter collection.

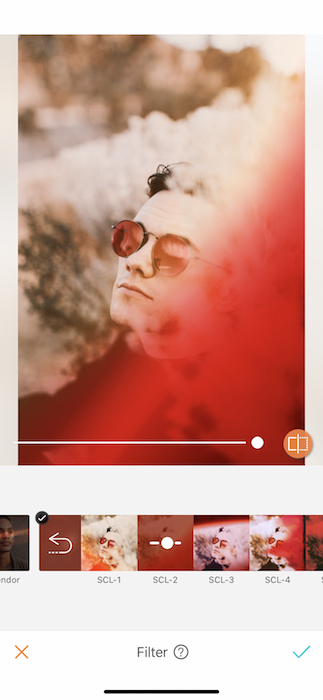
Save your first filter edit by tapping the blue check mark on the bottom right hand side. You’ll be brought back to the main toolbar. You’ll then go back to the filter tab and visit the Scarlett filter collection. Now you’ll notice that each of the filters shows up so much stronger and spookier than before.
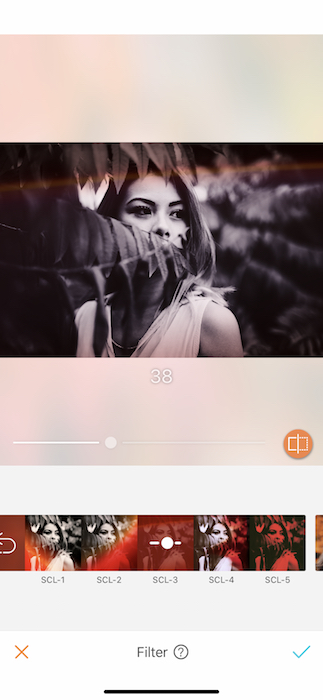
Each filter is completely adjustable. Just drag the toggle on the center of the screen back and forth until you’re satisfied with the filter strength. Can’t remember where you started? (from the bottom now, we’re here) tap the orange icon on the right of the toggle to see what your original image looked like before you worked your magic.


OoooOOOOoooo SpooOOOOoookkyyyyyy! If that’s not the cover of the newest slasher film we don’t know what is! Don’t be afraid to layer on those filters. They’re all just light cardigans waiting to be thrown together for the perfect picture outfit. Happy sweater weather season!
Seeing Red

Who doesn’t see red eyes and think AHH RUN! We’ve got just the trick for you…
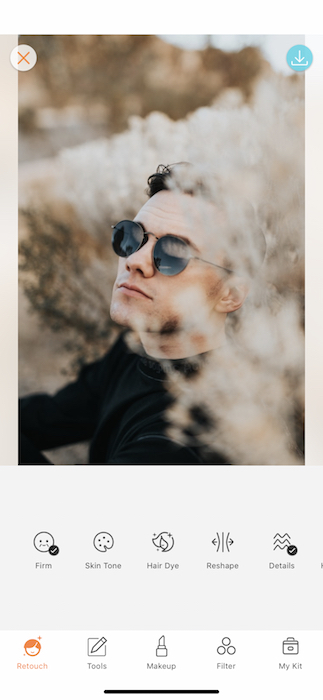
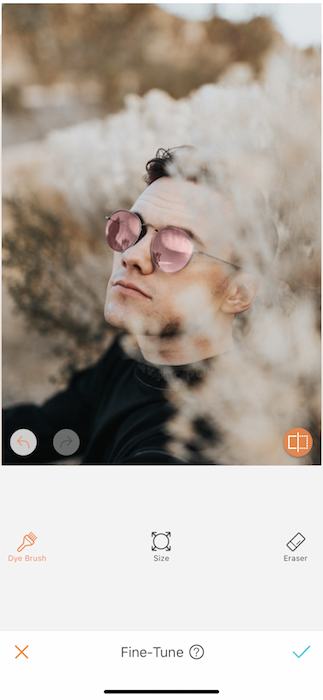
Today we’ve got a selfie hack that will blow your socks off. Start off by scrolling through your Retouch tool bar all the way over to Hair Dye.
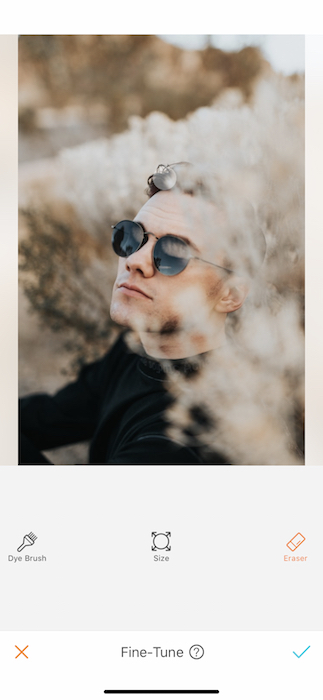
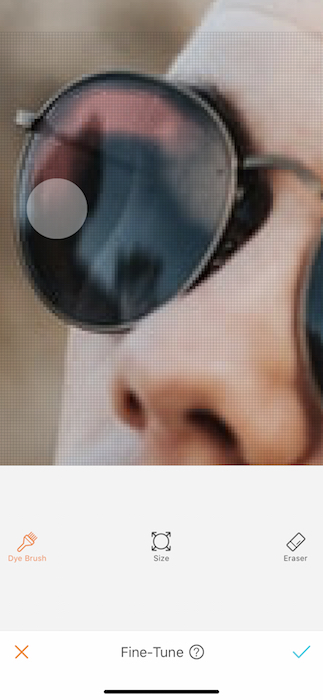
The Hair Dye tool will automatically detect your hair. But right off the bat, we’re going to erase all that because we’re here for different purposes. For an in depth look at the amazing hair dye tool check out our post on How to: Hair Dye. When you’re done erasing all the dye from your hair, switch over to the dye brush and start to paint your eyes or, in this case, glasses.
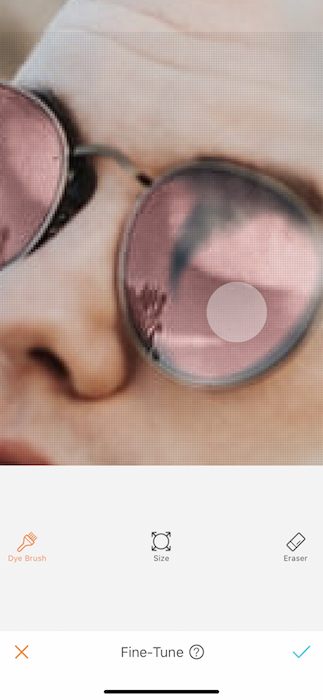
You can zoom into the image as much as needed to make sure you get those details nice and sharp. Once you’re done coloring in your target surface, zoom out to check your masterpiece.
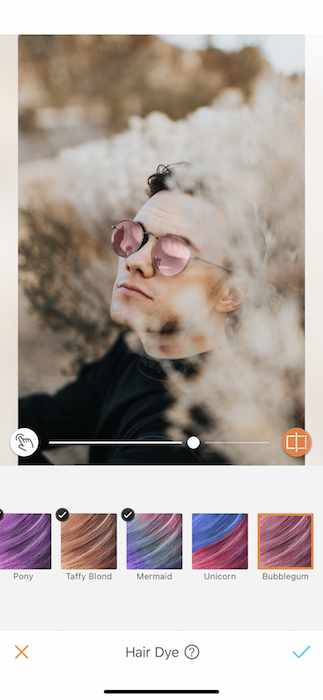
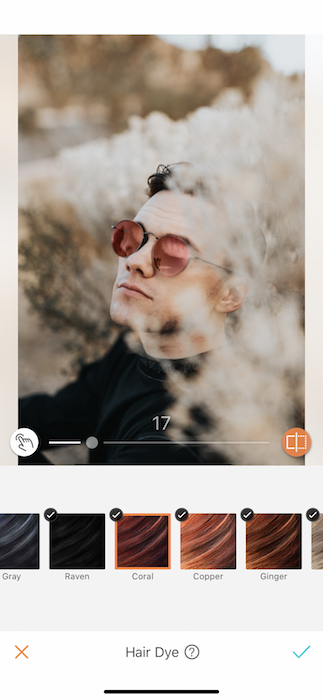
Your next step is to switch between hair dye colors until you find the perfect shade of deadly red.
Last but not least we can finally head over to our filters and throw on that Scarlett fever.

Well, we’re spooked. Are you? Show us what you’ve got and use the #AirBrushApp hashtag to be featured on @AirBrushOfficial! You’ll have the world falling in love with your pics.
- AirBrush Premium Feature: Sculpt - 03/11/2023
- Make the most of the Sculpt tool this Holiday Season - 02/11/2023
- How it’s Started, How it’s Going. Get that Glow Up! - 30/03/2021


- AirBrush Premium Feature: Sculpt - 03/11/2023
- Make the most of the Sculpt tool this Holiday Season - 02/11/2023
- How it’s Started, How it’s Going. Get that Glow Up! - 30/03/2021