Our tool, Background, has come a long way from its origins. You are now able to layer two static photos, hiding and revealing elements as you please. AirBrush is all about making our tools as dynamic as possible. And of course, we always keep simplicity in mind. Background has been fine-tuned to the point where you can now change the color, print or pattern of your clothes and we’re about to show you how!
Step 1 – Choose the Pic
First things first. Decide and upload which photo features an outfit you want to modify. Ideally, the subject should be close to medium range in the shot, so clothes are prominent. Secondly, avoid shots with contorted poses. Folds and creases in the clothes will make the edit difficult.
- After opening the AirBrush app, select your original photo the library
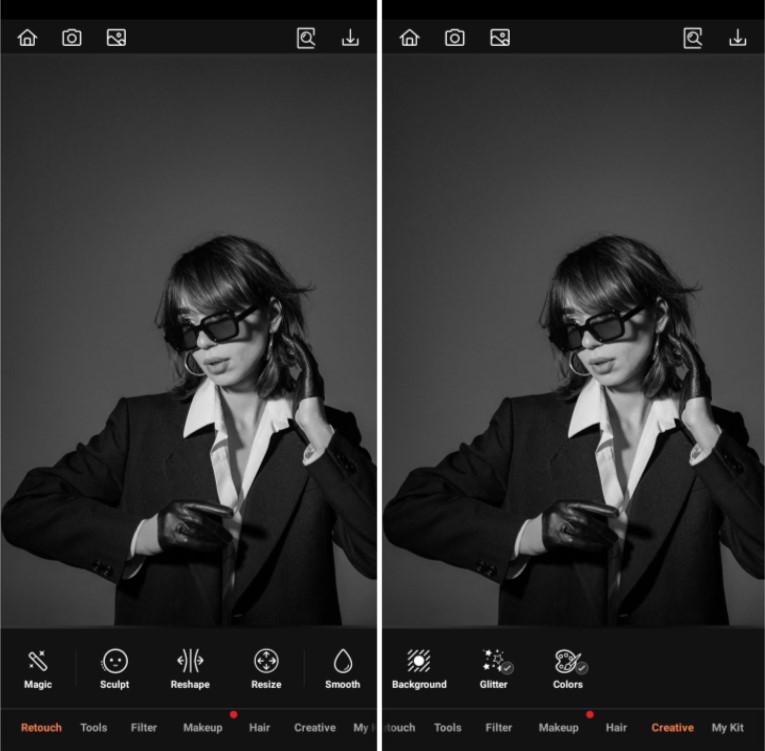
- Go to the Creative tab
- Select Background to begin the edit
Step 2 – Choose the second layer
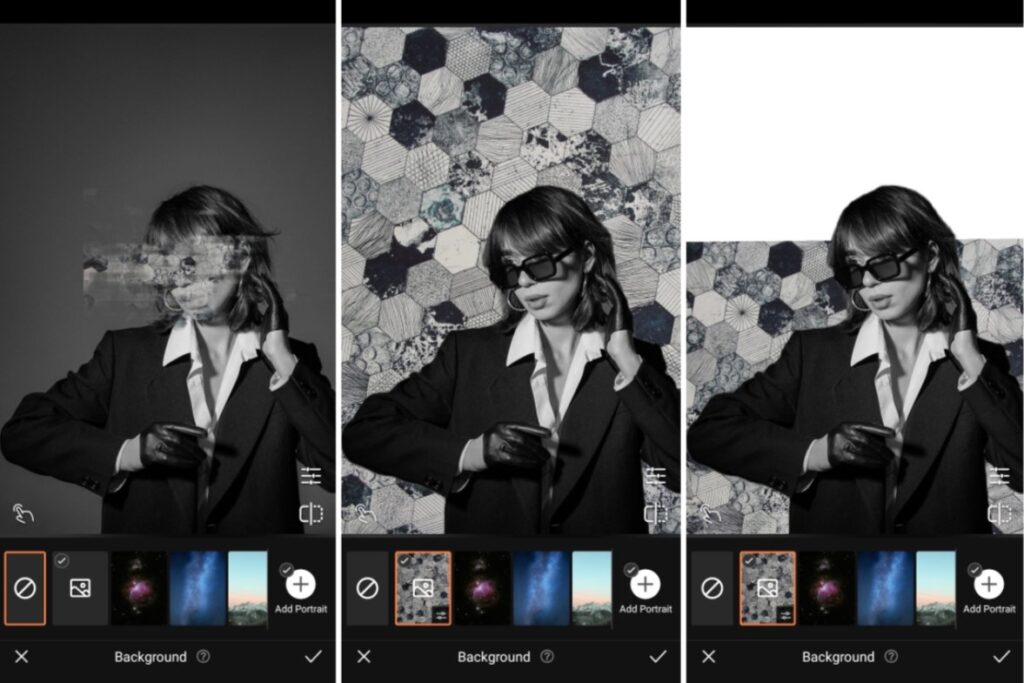
The next step requires you to select the layering photo. You could go for a solid bright, a random pattern or a personal or branded image. You can use the options AirBrush has built-in or you can take a photo of what you want to layer with.
- Add your layering photo by selecting the empty picture icon in the button left corner
- Select from your gallery
- Adjust the second photo into position to complement the clothes you’re transforming
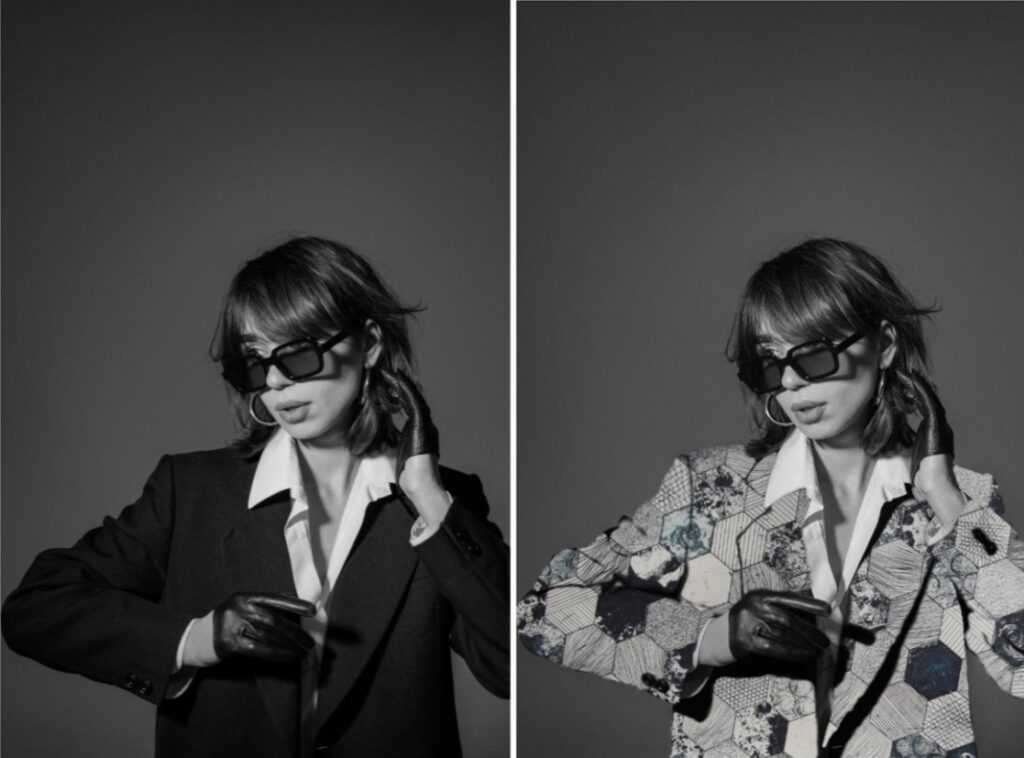
Step 3 – Conceal & Reveal
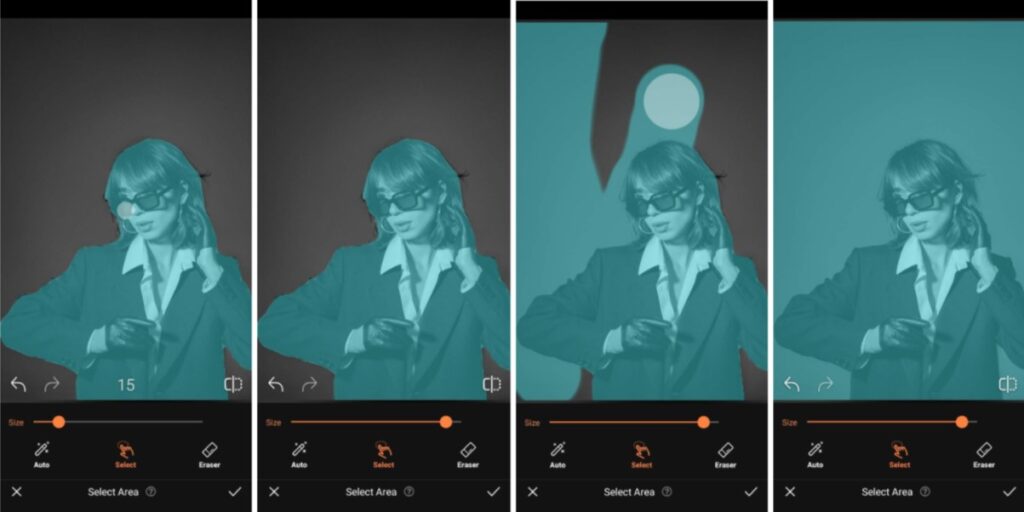
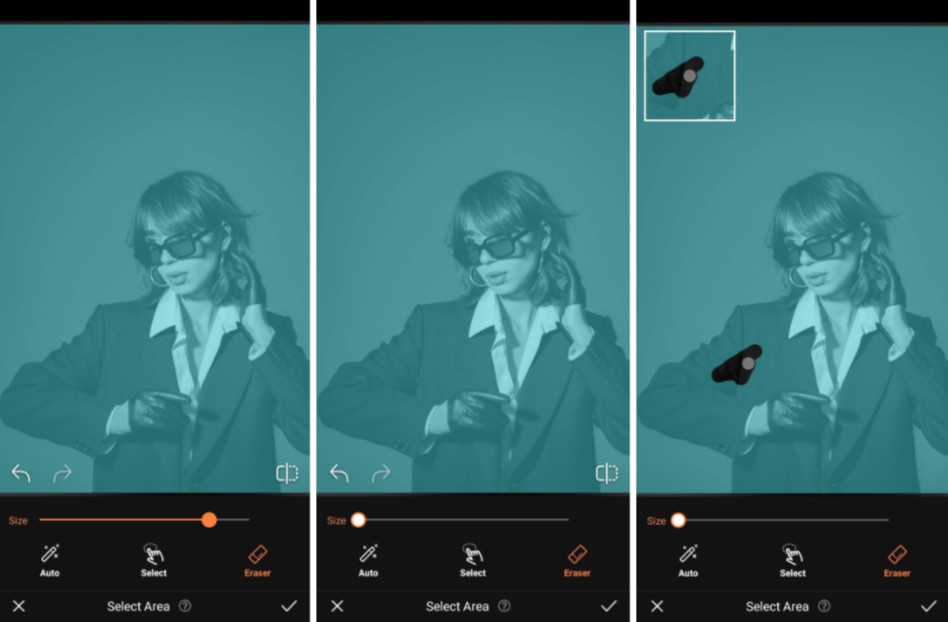
Now that your photos are layered, you can play around with the scale. Centre the clothes in the frame, then pinch and position the layering photo over the first. Then you’ll need to go in with the select and eraser tools to trim the layering photo.
- For a clean edit, increase the brush size and select the whole photo
- Select the Eraser feature and adjust the brush to a size you prefer
- Slowly begin the edit by erasing the sections you want the layering photo to show through
- Leave behind shadows, folds and seams for a realistic edit
Step 4 – Fine Tune Finish
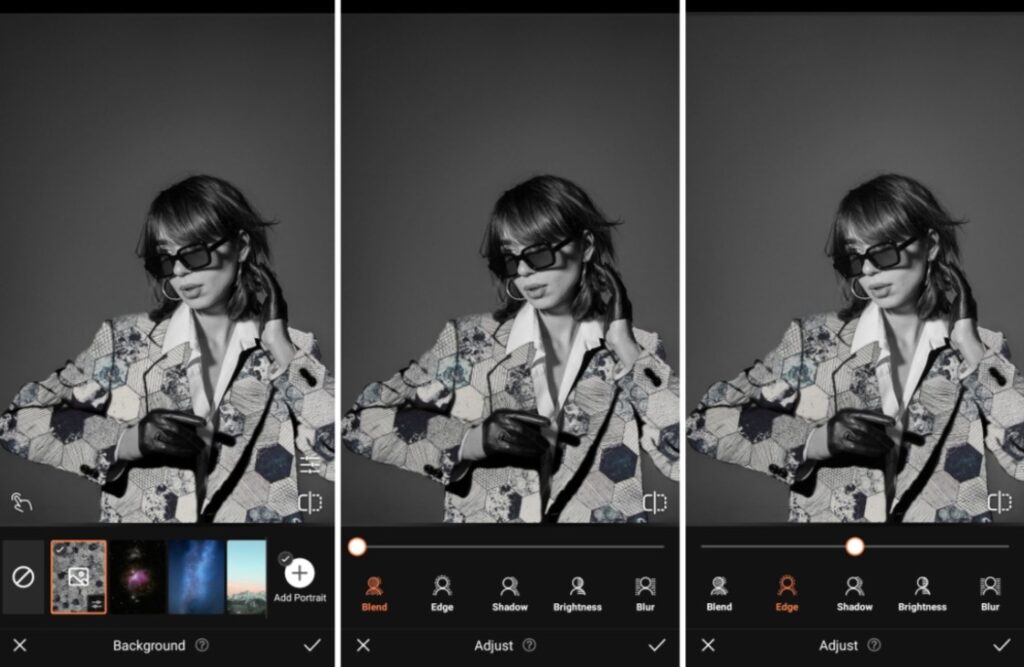
The last step involves blending your layers so the edit looks even more seamless. The featurettes are Blend, Feather, Shadow, Brightness and Blur. Toggling these effects helps offset differences in lighting and tone so that the completed edit is as natural looking as possible.
- Play around with the featurettes
- Use Blend to match color and tone
- Edge to clean up the edges of the areas you’ve selected
- Experiment with the other featurettes to blend the edit
And that’s it! In four steps you can switch things up and create a different wardrobe if you wanted to. AirBrush, the easy photo editor, stays committed to making our tools the easiest and most impactful to use. When you switch up your outfit and post, tag your photos with #AirBrushApp so everyone can find them. Then follow us @AirBrushOfficial for our latest tips, tricks and tools.
- How to Keep Photobombers out of your Photos - 03/11/2023
- 7 AirBrush Editing Tools for Influencers to Easily Enhance Their Photos - 03/11/2023
- 7 Tools for Easy Photo Edits with AirBrush - 03/11/2023


- How to Keep Photobombers out of your Photos - 03/11/2023
- 7 AirBrush Editing Tools for Influencers to Easily Enhance Their Photos - 03/11/2023
- 7 Tools for Easy Photo Edits with AirBrush - 03/11/2023