AirBrush has a new kid on the block. After its recent debut, allow us to reintroduce the Stamp Tool. This feature allows you to choose one area of your photo and cover it with a “stamp” of another area of the photo. You can literally replicate and lift one part of your pic and place it over another area. There are a few scenarios where this tool can prove its utility but use it any way you can imagine. Let’s get started with a quick guide.
Step 1: Select
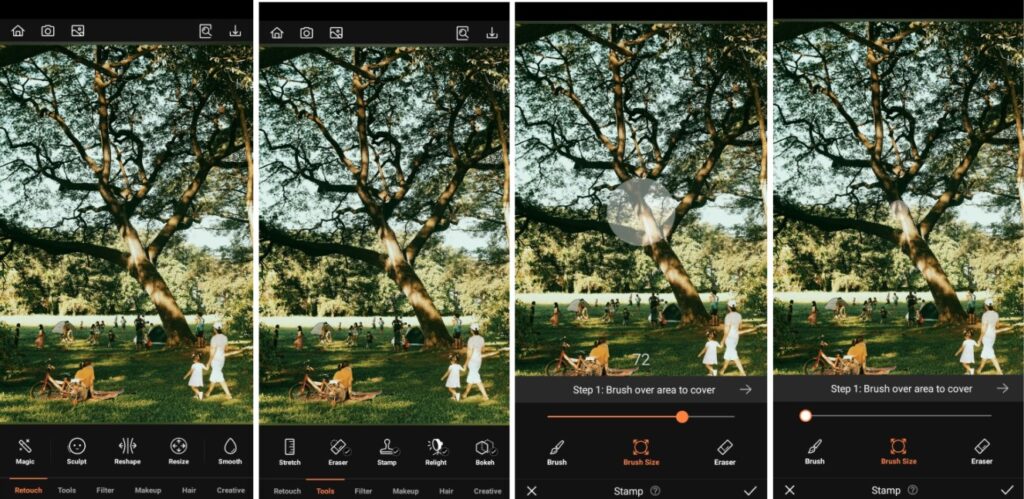
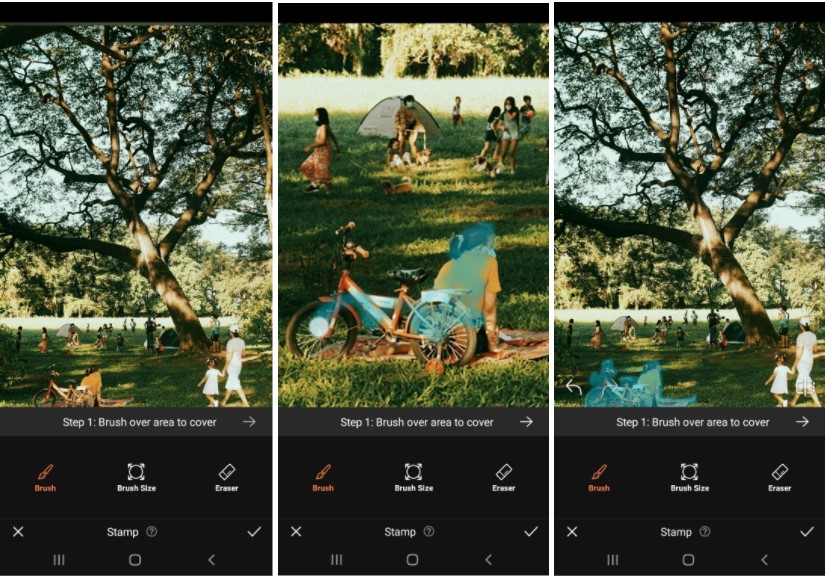
Once you upload the pic you want to edit, swipe and cover the area you want to Stamp. Zoom in to get a more precise coverage and ensure the entire area gets an opaque covering. Pay attention when covering the edges of the selected area. The Stamp Tool has a fade and blur effect that will automatically apply if you don’t cover the selected area properly.
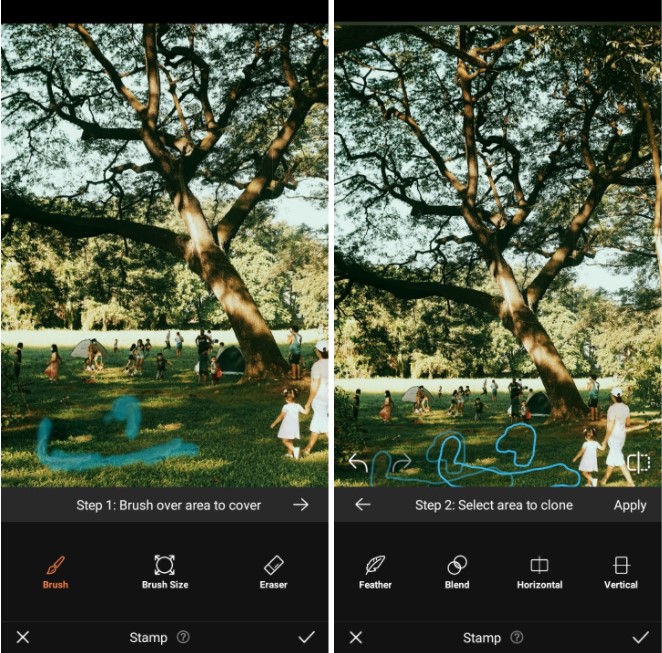
Step 2: Grab
After you’ve completely selected the area you want to cover, go to the second step by clicking the right-pointing arrow. The Stamp Tool shows you an outline of the area you just selected and you can move it around the rest of your photo to select an area to cover. You can overlap slightly on the piece of the photo you’re trying to cover if the available space you’re copying isn’t big enough. Once you’ve got the best matchup, click Apply to save the change.

Step 3: Repeat?
You may have to repeat the previous step once the bulk of the area you want to be removed is gone. Once you apply the first stamp, you are conveniently taken back to step one, where you can refine by repeating the previous steps.
Step 4: Toggle
To help you get a seamless look, the Stamp Tool has four tweak features are at hand to handle the details:

Feather – controls the opacity of the area you’re stamping. Maxing this out in the Stamp Tool can create a double exposure effect. In most cases, though you may want to keep the feathering to a minimum so as to completely cover the unwanted area.
Blend – helps with the lighting and tonal quality of the area you’re stamping. As seen in the example, the grassy areas have some shady and sunny patches. If you want to take a sunny patch to stamp over a shady patch, this is where Blend comes in useful.
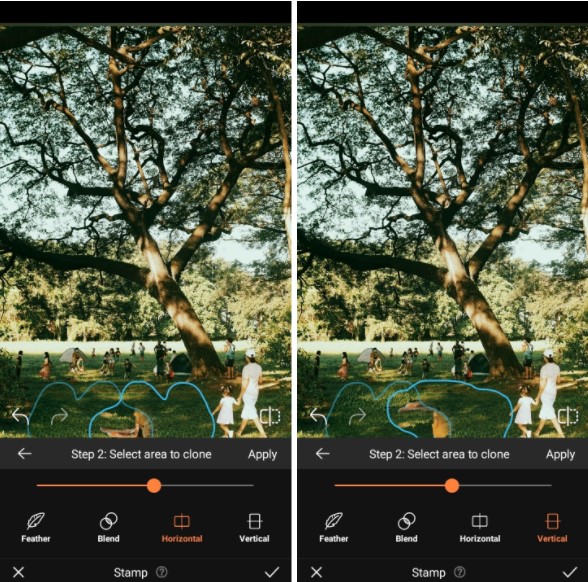
Horizontal & Vertical – these two features do exactly as they say. They flip the selected area left and right or up and down. This can help you find a better match when placing the Stamp over the selected area. It can help the effect appear more seamless as it helps break up and conceal edit lines.
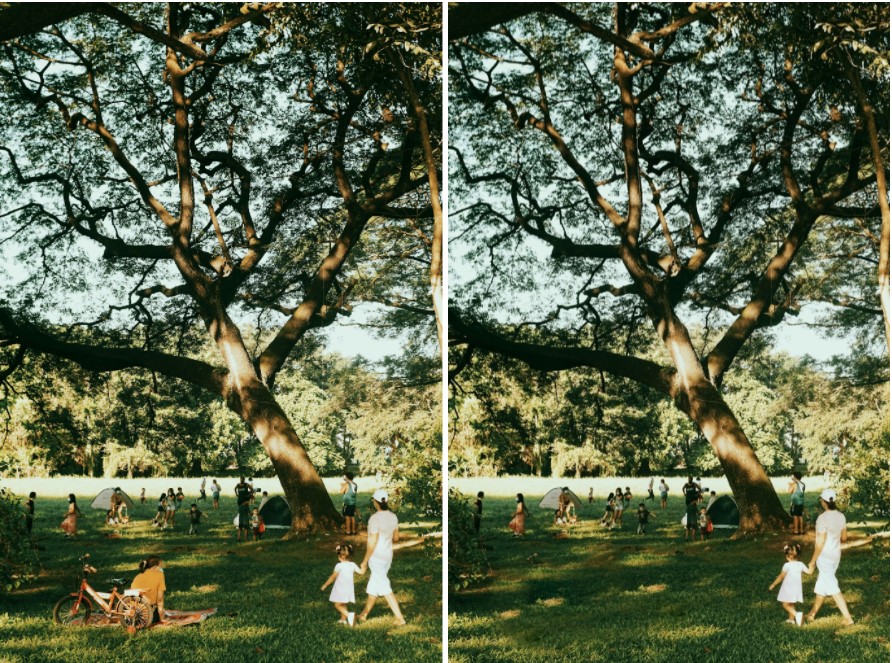
All done in four steps? Yep, it’s that easy. And the Stamp Tool isn’t just for removing subjects from photos. You can use it to replicate a subject and fill the photo instead. We love a multi-use feature! Use AirBrush, the easy photo editor, to try out editing with our new Stamp Tool. Tag your pics with #AirBrushApp so we can find them and then follow us @AirBrushOfficial on Instagram for our latest tips, tricks and hacks!
- How to Keep Photobombers out of your Photos - 03/11/2023
- 7 AirBrush Editing Tools for Influencers to Easily Enhance Their Photos - 03/11/2023
- 7 Tools for Easy Photo Edits with AirBrush - 03/11/2023


- How to Keep Photobombers out of your Photos - 03/11/2023
- 7 AirBrush Editing Tools for Influencers to Easily Enhance Their Photos - 03/11/2023
- 7 Tools for Easy Photo Edits with AirBrush - 03/11/2023