We know there’s a lot to love about AirBrush. The Makeup and Retouch Tools, Relight for professional touches and the many, many FIlters that help you customise your photos to your exact style. What we also love are the constant new offerings that help turn your editing up a notch. Introducing Stamp, the newest tool from the easy photo editor. We’ll walk you through it soon but Stamp was developed to take a section of your pic and “stamp” it over an undesired area, like a photobomber. So get ready to take a few notes as we take you through our latest, greatest tool and how it can help you remove photobombers.
Step 1: Stamp
Our new Stamp Tool works best with a relatively uniform background. But barring that one caveat, it completely obliterates any unwanted object from your photos, replacing it with a selected section of pixels already in the pic.
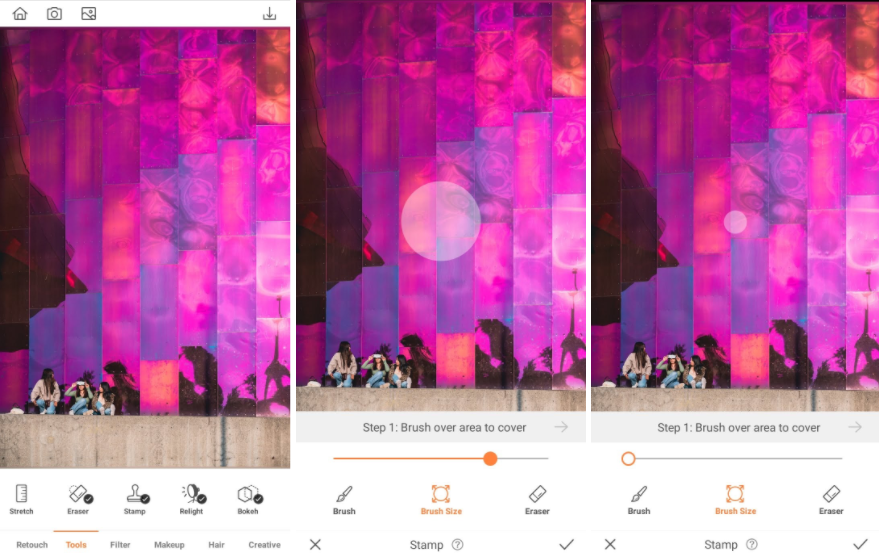
Once you’ve uploaded your photo, lets get started on removing photobombers. Head to the Tools menu and look for the Stamp located after Eraser. Once inside you’ll see the Brush, Brush Size and Eraser for the first step of Stamp. Select the best brush size to work with and then swipe over the unwanted area of your photo. If you select any area by mistake, use the Eraser tool in Stamp to correct the selected area.
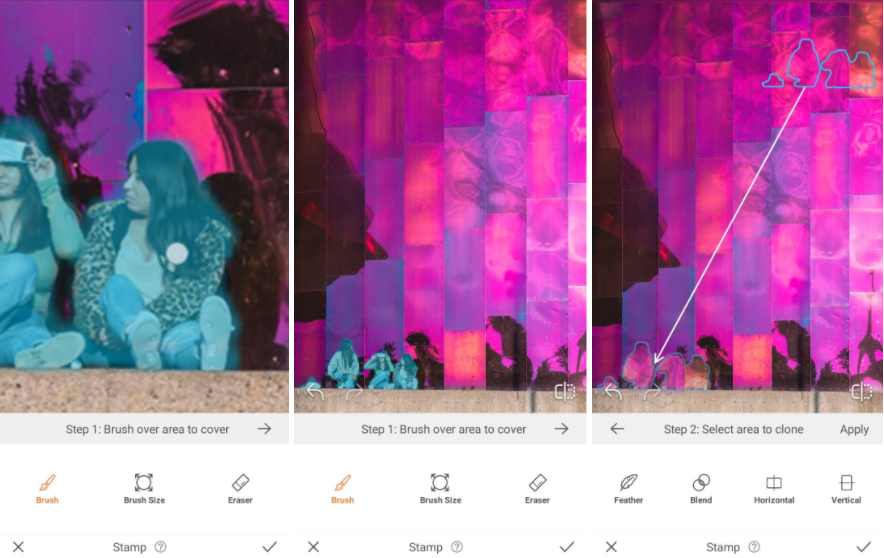
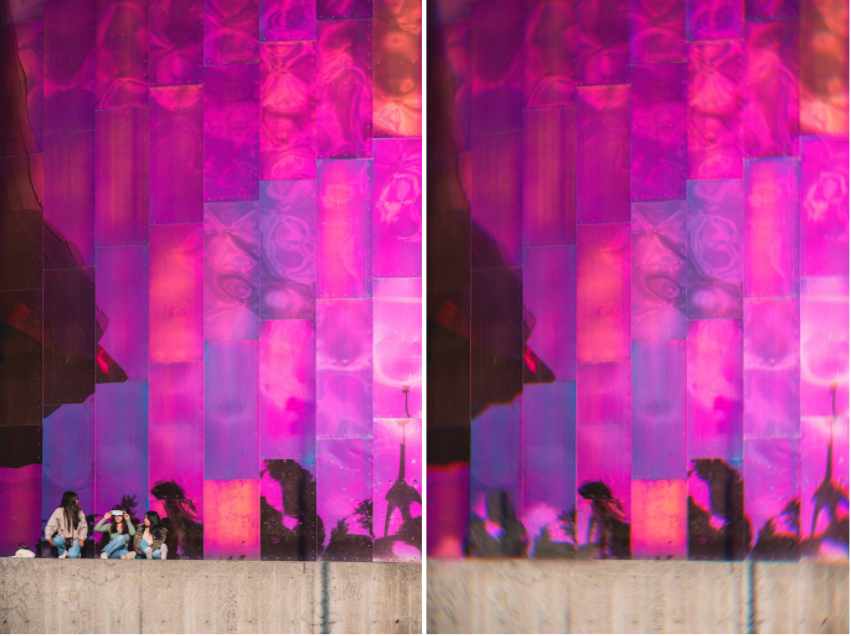
After you’ve completely selected the area you want to eliminate, go to the next step to stamp over the section. You’ll see an outline of the area you just selected and you can move it around the rest of your photo to select an area to cover and remove photobombers . If your pic has panels like in the photo below, try and line it up with your selected area for a more seamless blend.
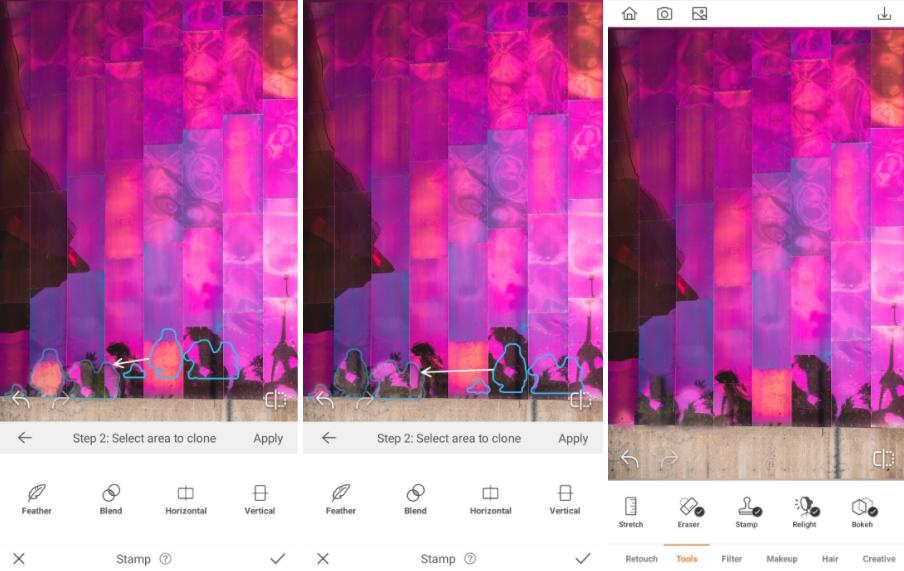
Optional: Feather, Blend, Horizontal, Vertical
Stamp has even more features to play around with to assist with making the removal of photobombers as easy as possible. Feather and Blend are used to mix a bit of what was there before with the new pixels. This can be useful for a forested or other natural environments where patterns are random. Likewise, for Horizontal and Vertical, use these to invert the area you want to use to Stamp over your photobombers. You’re more likely to find a combination that makes removing photobombers even easier.
Step 2: Eraser
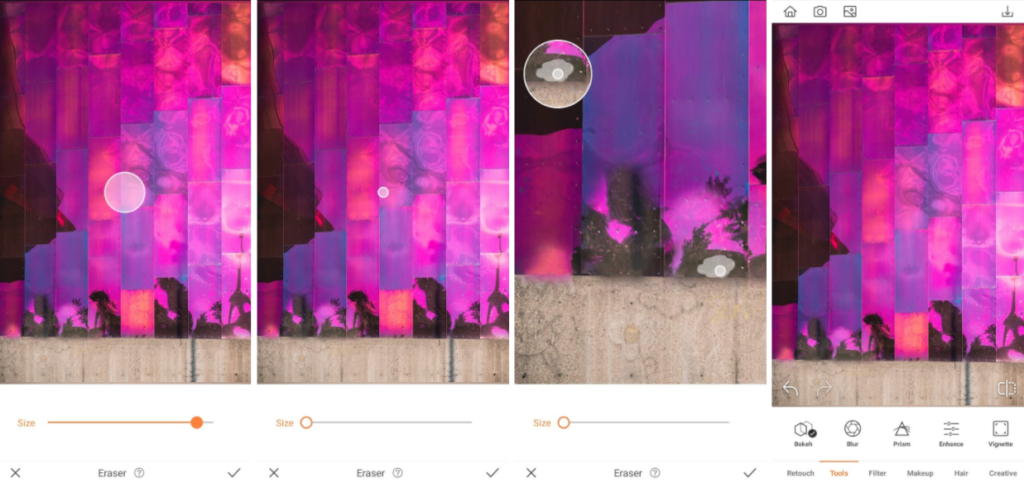
Once the heavy lifting is out of the way, you can head to Eraser to clean up any of the finer details after you remove photobombers. Similar to Stamp, Eraser takes nearby pixels and applies them to the area you select. So if your swiping finger wasn’t the most exact, Eraser can come in for fine-tuning. Tap over any areas that weren’t fully taken away with Stamp and watch the last bits of your photobomber be eliminated.
Optional Step 3: Filter/Prism
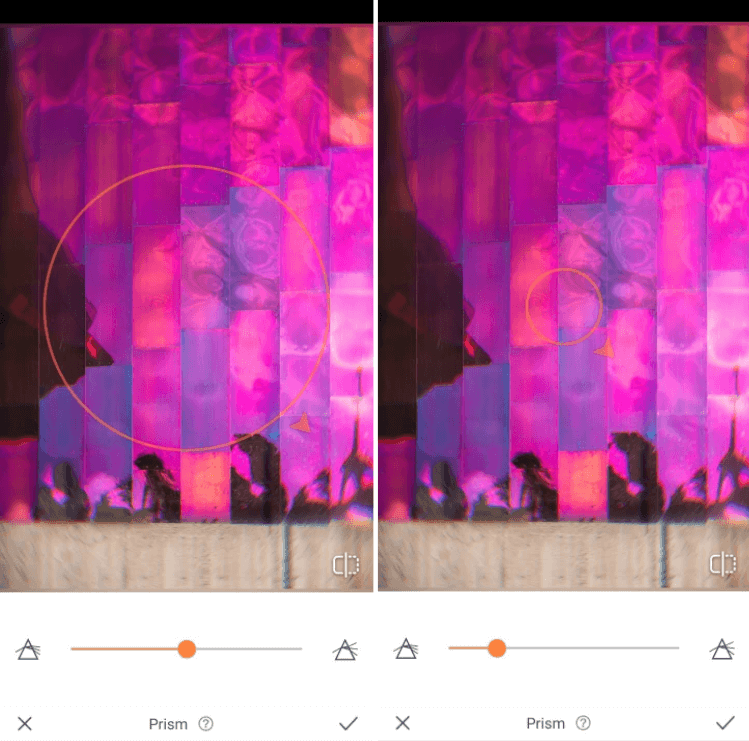
After you’ve removed your photobomber, you can take your photo in any direction you’d like. Throw over a FIlter to add some dramatic effect. Or as in this case, use the Prism Tool to create a new background. Which can then be used with AirBrush’s Background feature for loads more options.
Man! We love it when a tutorial comes together to give you mega options and versatility. The new Stamp tool is sure to become a favorite on AirBrush, the easy photo editor and we can’t wait to see how you use it to remove photobombers in your photo edits. Once you do have your edits ready, tag them with #AirBrushApp so everyone can see them. Then follow us on @AirBrushOfficial for the first look at all our newest tools and regular tips, tricks and hacks.
- How to Keep Photobombers out of your Photos - 03/11/2023
- 7 AirBrush Editing Tools for Influencers to Easily Enhance Their Photos - 03/11/2023
- 7 Tools for Easy Photo Edits with AirBrush - 03/11/2023


- How to Keep Photobombers out of your Photos - 03/11/2023
- 7 AirBrush Editing Tools for Influencers to Easily Enhance Their Photos - 03/11/2023
- 7 Tools for Easy Photo Edits with AirBrush - 03/11/2023