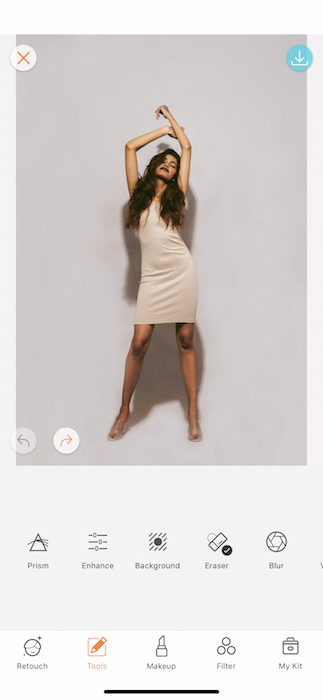
Bible, we love you, Kim! Since 2002 this Armenian princess has brought us all the drama, glamour, beauty, & selfies we could ever ask for. Now after announcing the end of her reality show, a dynasty in American television, we could only wonder what amazing things are ahead for the Kardashian family. That is why in honor of the influencer of our lifetime we’re going to be listing the top Airbrush features to get you Kardasha-ready for the camera.
You’re doing amazing sweetie


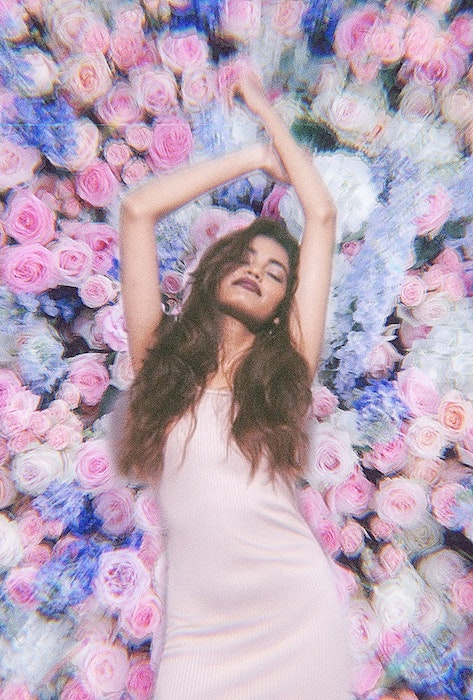
Kim Kardashian West has given us some of the most iconic moments in television history. This includes the massive, out-of-this-world flower walls at her wedding to Mr. Kanye West. Now, a towering flower wall may be hard to come by but thankfully you won’t need one. We’re going to recreate this legendary moment with our easy to use Background tool.
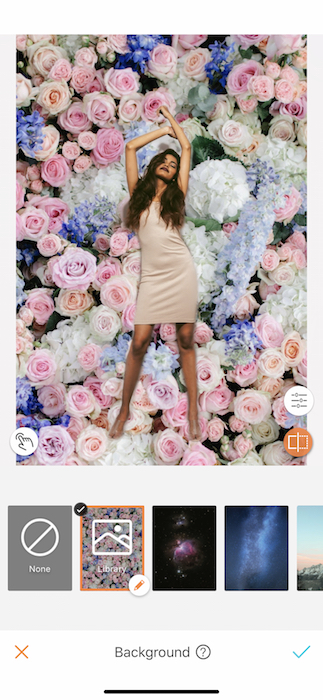
First off you’ll want to make sure to have your own flower wall background saved in your phone. Once you upload your chosen pic you’ll go over to the Tools panel. There, you’ll scroll to the right until you find the Background tool. Once you’re on the Background panel you’ll notice a wide variety of available backgrounds. Today we’ll be tapping the library button and uploading our own saved flower wall pic.
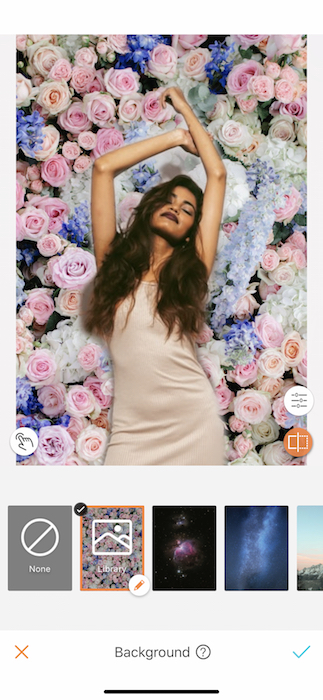
Once you’ve uploaded your pic you can use two fingers to adjust the size and orientation of the background picture. You can do the same with yourself by pinching in and out with two fingers. Once you’ve settled everything in its place you can tap on the finger icon on the left hand side and use it to adjust the background area.
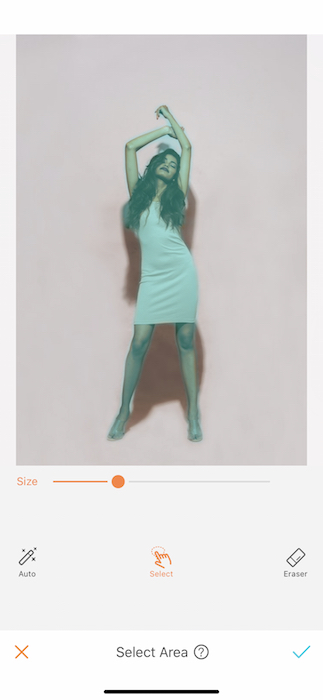
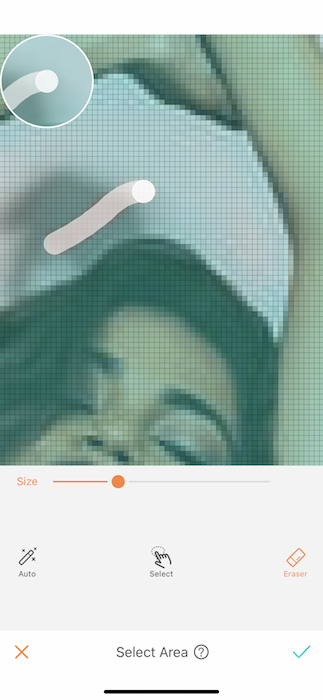
Here, we’re going to tap Eraser and get rid of the area we don’t want included in our focal figure. Once you’ve cleaned up the details you can use the settings tab on the right to get the everything squared away with brightness and clean up any edges that might still need a little shaving. Now you’ve got the perfect flower wall backdrop! Tap the blue check mark and let’s make our way over to the filters tab.
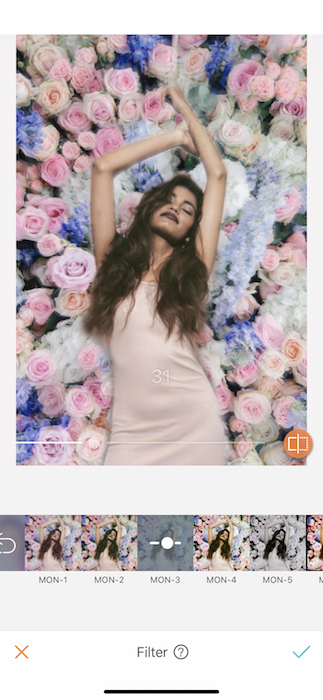
Nothing seals the deal like a solid filter. Our good’ole Kim Kardashian loves that vintage VHS feel so we’re going to tap into the good vibes of the Monocle filter pack. You can adjust the strength of each filter by sliding the toggle from left to right at the bottom of the image. Once you’re ready to commit, tap the blue arrow and BAM. There may be people dying, Kim, but this pic is a diamond [earring].
DON’T BE RUDE
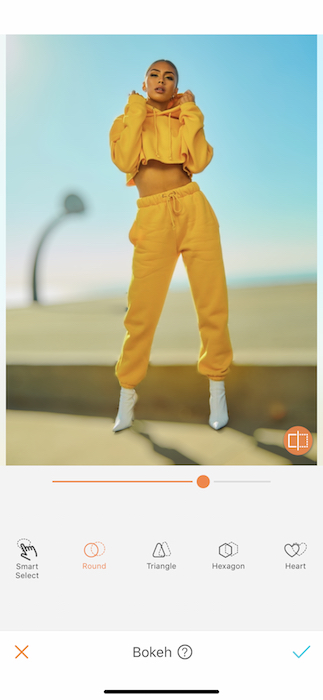
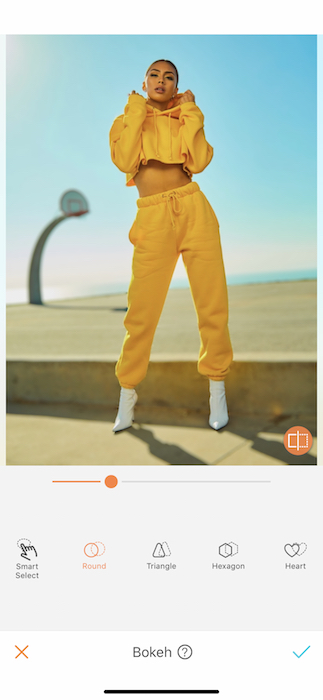
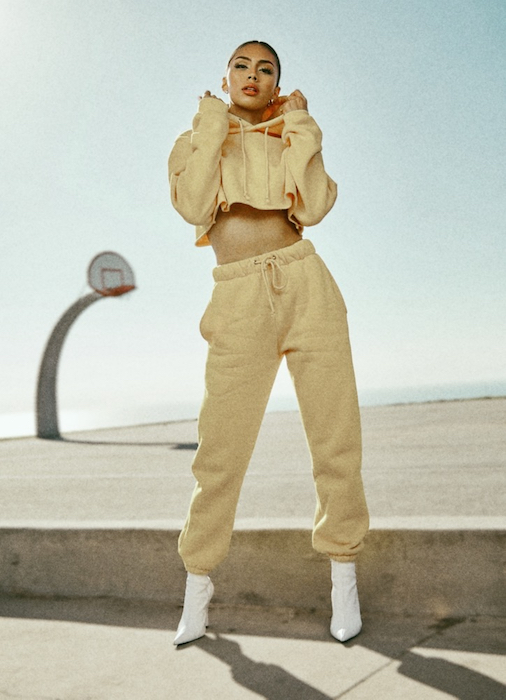
It might technically be considered rude to have this much attitude. Kim has never lacked in that department so for this tutorial we’re gonna drip in swagger and get to the heart of what a Kardashian social media star should be. First and foremost Kim always knows that if the camera is on it should be focused on her. So what better way to pull focus than with the incredible Bokeh tool. The Bokeh tool allows you to blur your surroundings and change the motif for different but subtle textures. When you tap the Bokeh tool it will allow you to adjust the strength of the tool.
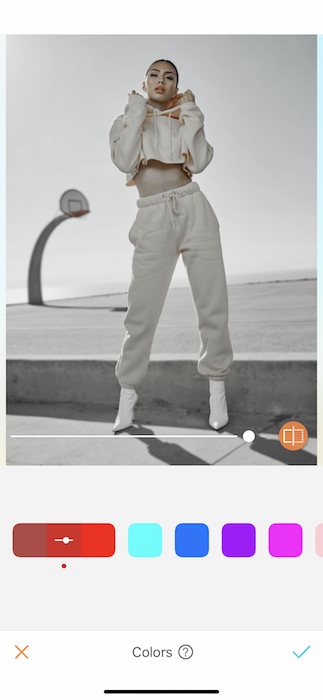
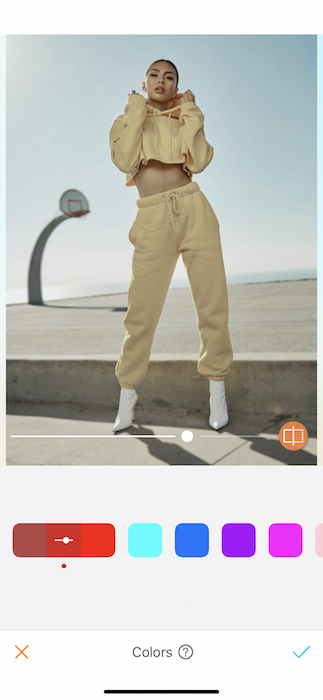
Next up we’ll want to soften the image to give it that editorial vibe. Tap the Colors tool and play with all the different hues you can focus on. For our pic we’re going to get red-y for glamour by playing with the midtones in our picture. Notice that you can easily adjust the strength of the color tool by sliding the toggle left to right.
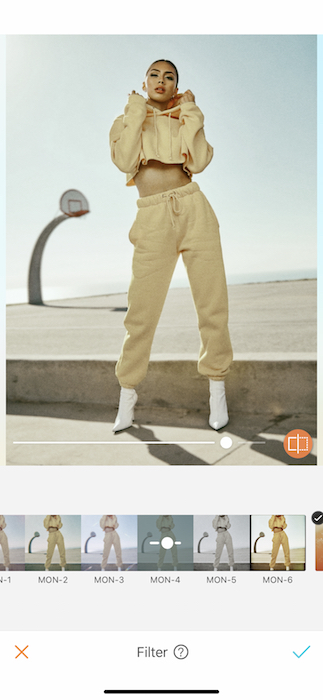
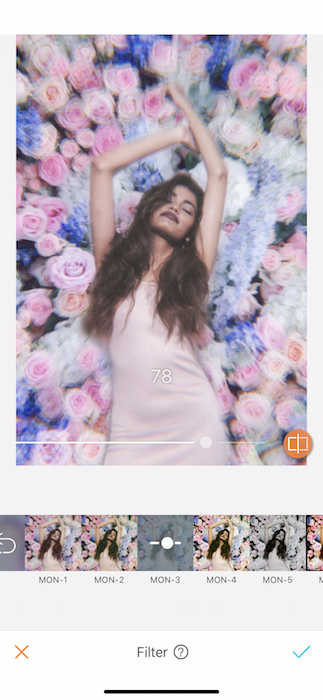
Now that we’ve got our soft, dreamy picture it’s time for another trip to the Monocle filter group. Tweak away at the filter strength until you feel like your pic is more than kkw.
Are you obsessed? We are. Now it’s your turn to break the internet! Make sure to upload your photos and tag #AirBrushApp on Instagram to be featured on our profile, @AirBrushOfficial.
- AirBrush Premium Feature: Sculpt - 03/11/2023
- Make the most of the Sculpt tool this Holiday Season - 02/11/2023
- How it’s Started, How it’s Going. Get that Glow Up! - 30/03/2021


- AirBrush Premium Feature: Sculpt - 03/11/2023
- Make the most of the Sculpt tool this Holiday Season - 02/11/2023
- How it’s Started, How it’s Going. Get that Glow Up! - 30/03/2021