We’ve got a theory that it takes a special kind of entrepreneur to start a jewelry brand. And we don’t just mean the capital cost. A lot of emotive power exists in jewelry. There’s all the confidence it can bring when worn and the sentimental value they hold to an individual or family. But before you can help people create those memories and feelings, you need to use these product photography tips from AirBrush to get them to notice you. Keep reading to see how!
- How to Keep Photobombers out of your Photos - 03/11/2023
- 7 AirBrush Editing Tools for Influencers to Easily Enhance Their Photos - 03/11/2023
- 7 Tools for Easy Photo Edits with AirBrush - 03/11/2023
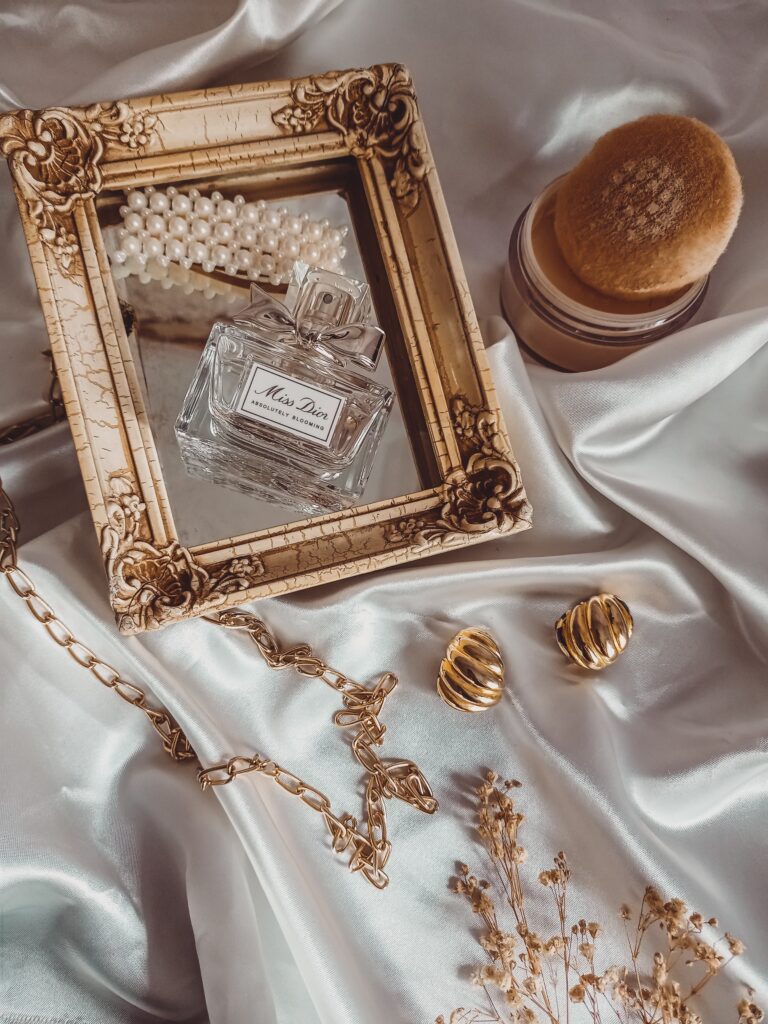
Set Design
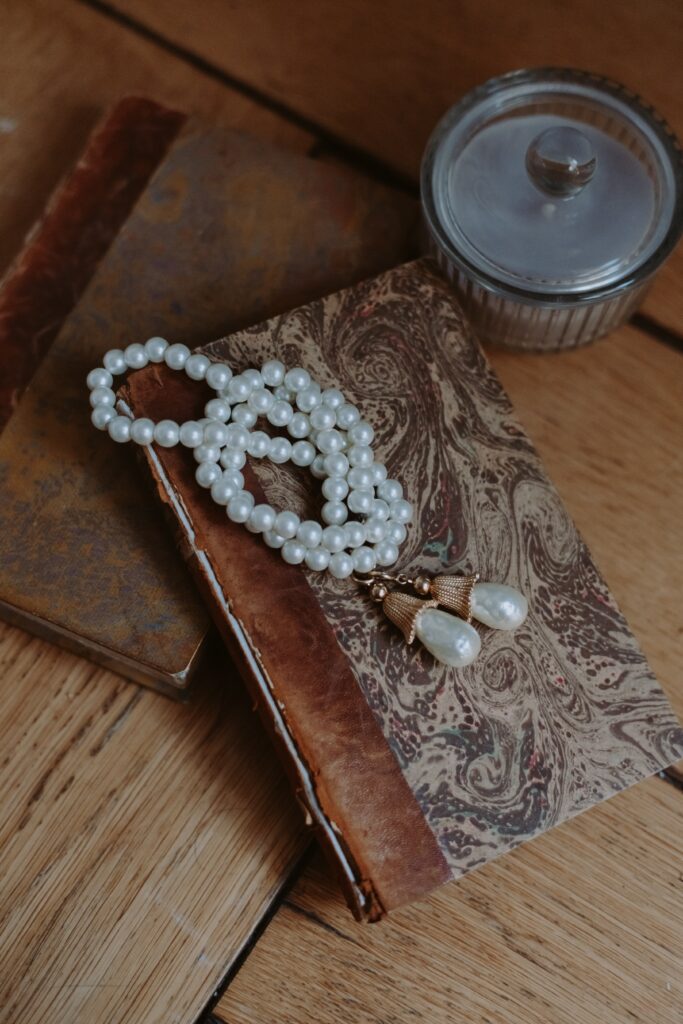
You want to fall back on a stark white backdrop as a no-fail option for your jewelry brand. However, you can opt for more visual interest by trying this product photography tip. Invest in props that vary in size, shape and textures to help create the vibe that appeals to your target audience. Whether you what to emphasise the youthful or sustainable or aspirational element of your jewelry brand, feel free to be experimental.
Lighting
Taking your time to get the lighting right is a critical factor when taking product shots. For jewelry in particular, adequate and exceptional lighting means the difference between a good photo and a great jewelry photo full of twinkle and shine. Your products need to be well-lit and shot from multiple angles. Make it easy for potential customers to familiarize themselves with the product on the screen as they would in a store.
Demo Shots
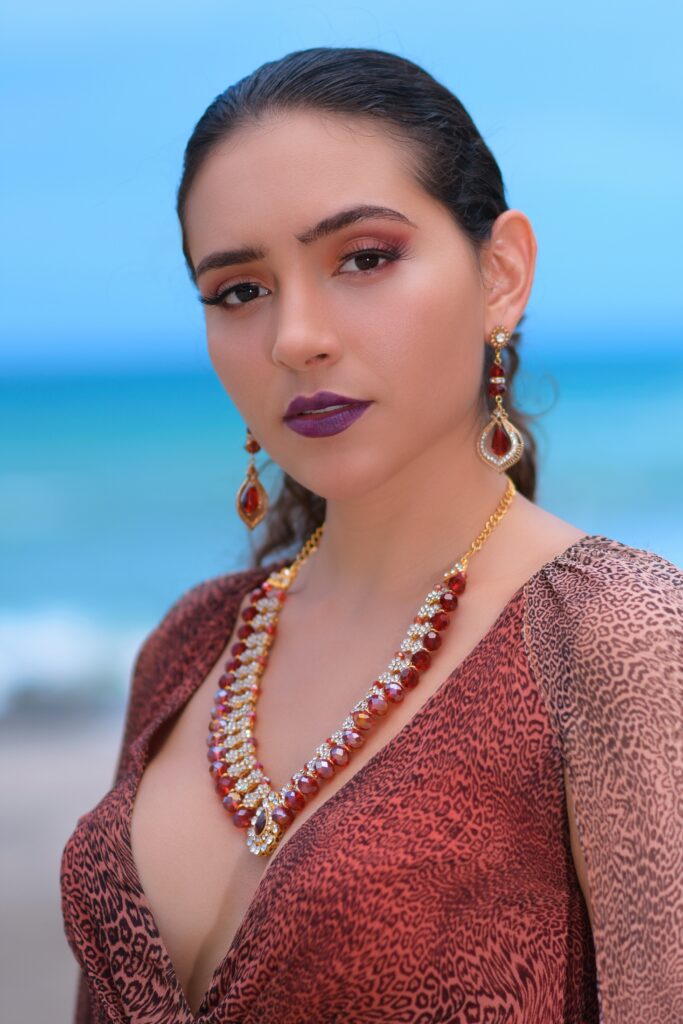
Among our list of product photography tips, demo shots can mean the difference between a viewer stopping mid-scroll or them swiping away. Showing your jewelry in actual use, in the aesthetic that gels with your brand, further helps the customer see themselves wearing the jewelry themselves. To get the right shot, visualize your target customer and reflect that in your visual content.
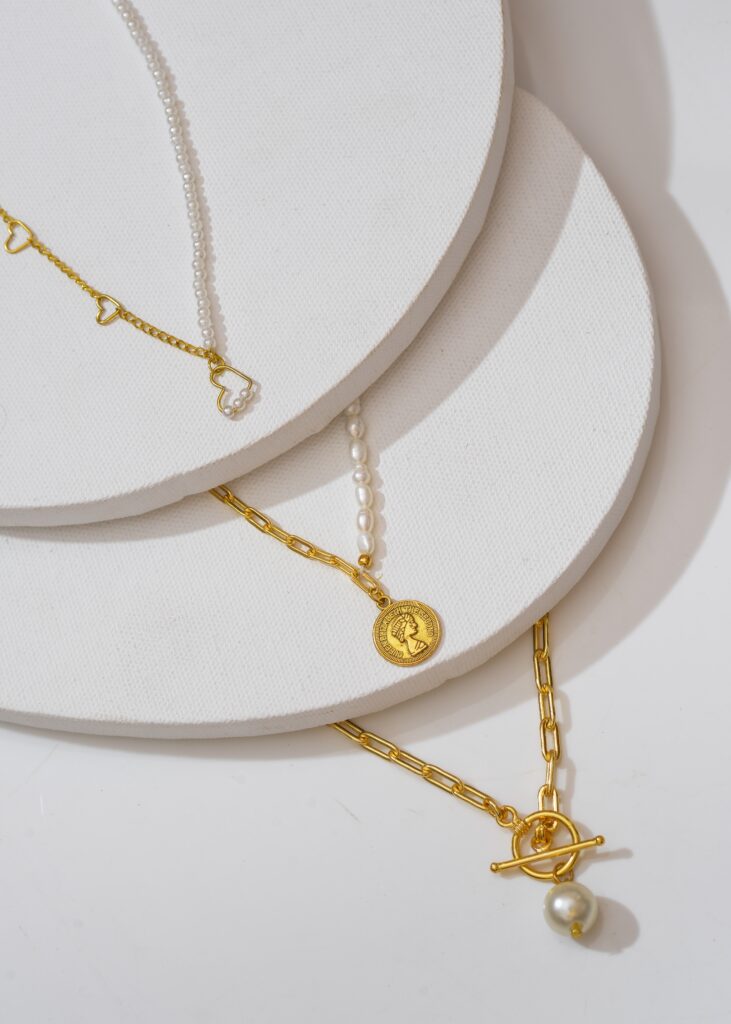
Presentation
It doesn’t matter if your branding is luxury-focused or craft-centered, you need to make the product shot look as polished as possible. That is to say, the product, the jewelry should look idealized as idealised as possible. That means considering the small details, which encompasses creating that “edited” look as opposed to the raw photo.
Product Photography Tips: The How To
Crop
First up is the Crop tool which comes in handy when repurposing content and when you want to bring the focus to a particular piece.
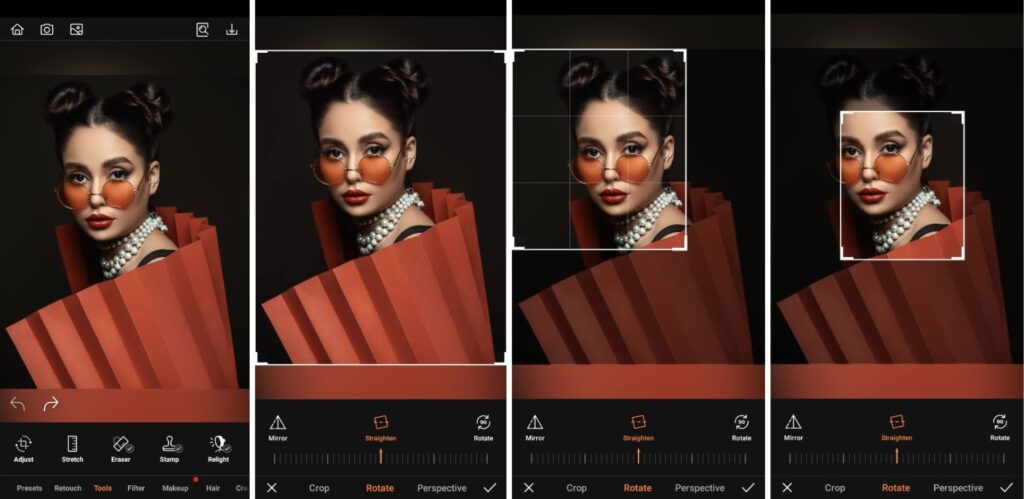
- Go to the Tools Tab on the Main menu.
- Select Adjust
- Adjust the dimensions
- Tap the check mark to save your edit
Background
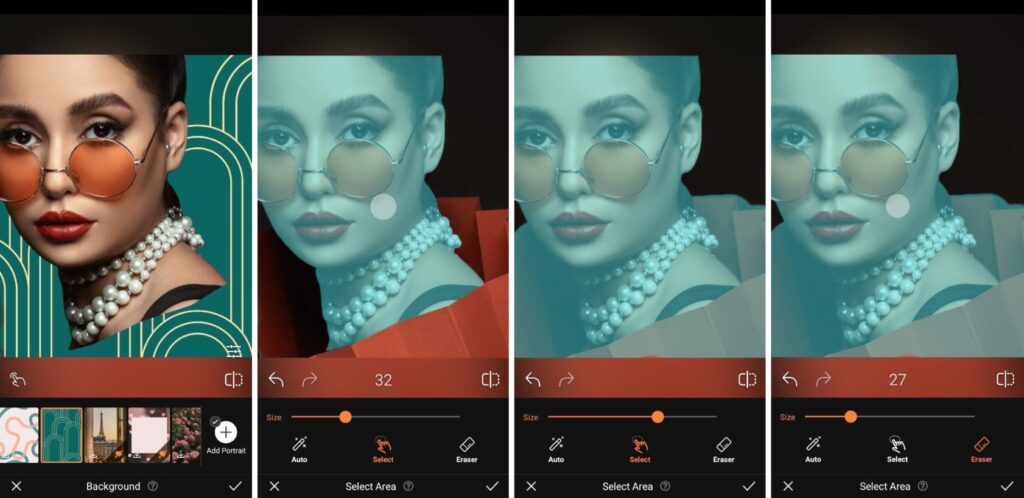
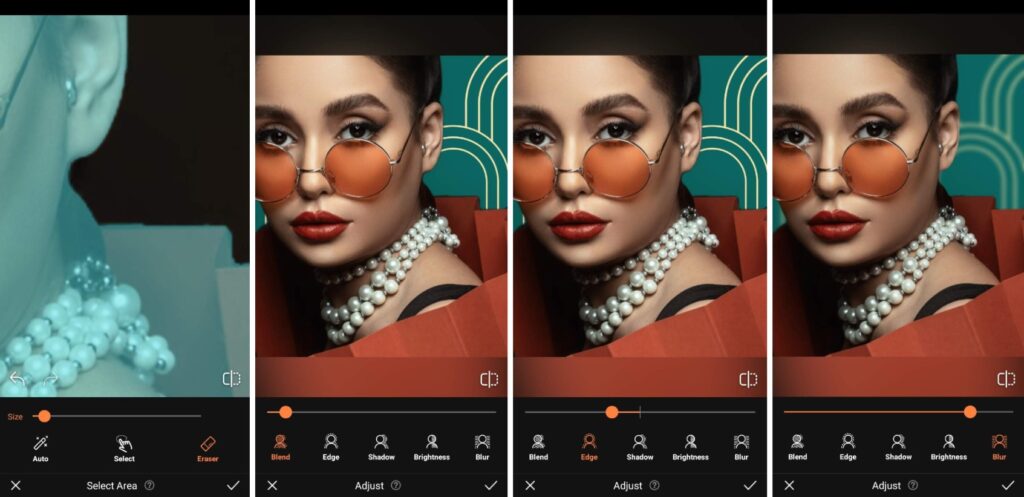
Stage your product in the perfect backdrop with Background. Use a model or the product on its own, changing the background virtually. Either way, you’ll save money and time on arranging your own props.
- Go to the Creative Tab on the Main menu.
- Select Background
- Choose any of the existing backgrounds or upload your own.
- Adjust the scale of the subject by pinching in and expanding out.
- Use featurettes like Blend, Edge, Brightness, Blur or Eraser to perfect your edit.
- Tap the check mark to save your edit
Relight
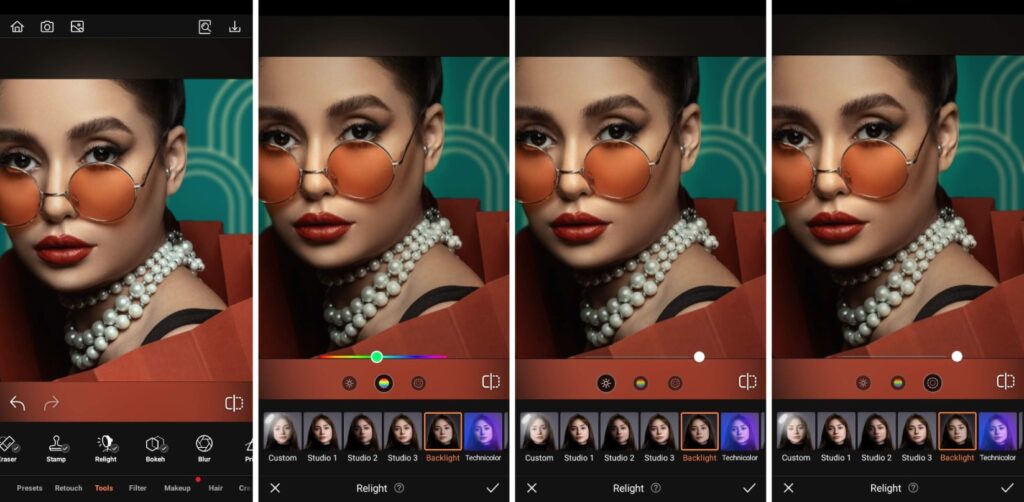
Achieve studio-quality lighting and show off your jewelry accessories with Relight. To show the actual color and texture of the materials, keep the light bright and focused. For a more editorial look try multi-colored light options like Neon.
Bonus Tip: Details will help emphasise the facets and cuts on your pieces.
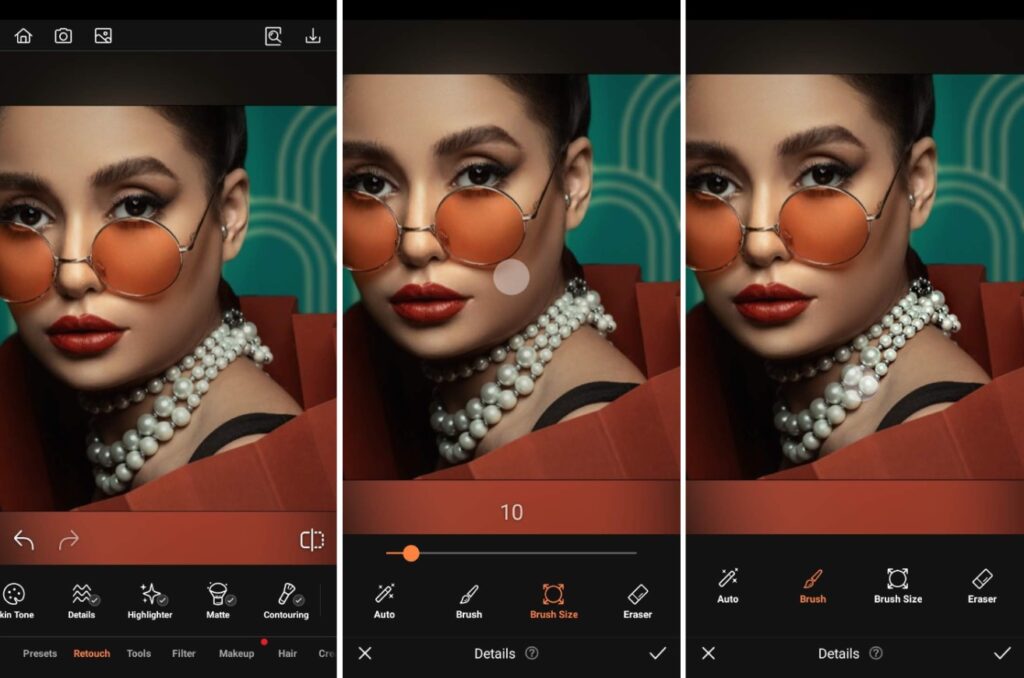
- Go to the Creative Tab on the Main menu.
- Select Relight
- Choose the option that best highlights the piece
- Tap the check mark to save your edit
Enhance
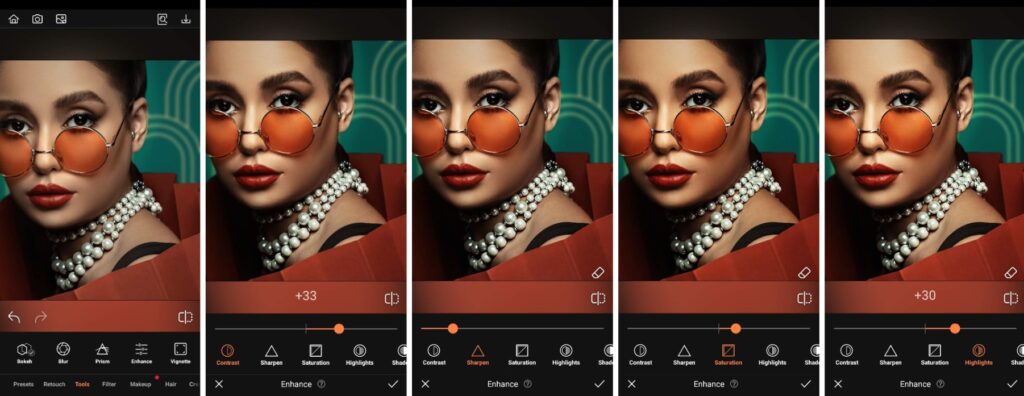
If you want to showcase your jewelry in situ, Enhance ensures it looks amazing. That’s where Enhance comes in. Adjust Saturation, Contrast, Highlights and Shadows to get the perfected edit.
- Go to the Tools Tab on the Main menu.
- Select Enhance
- Select the options to customise the photo
- Tap the check mark to save your edit
Filter
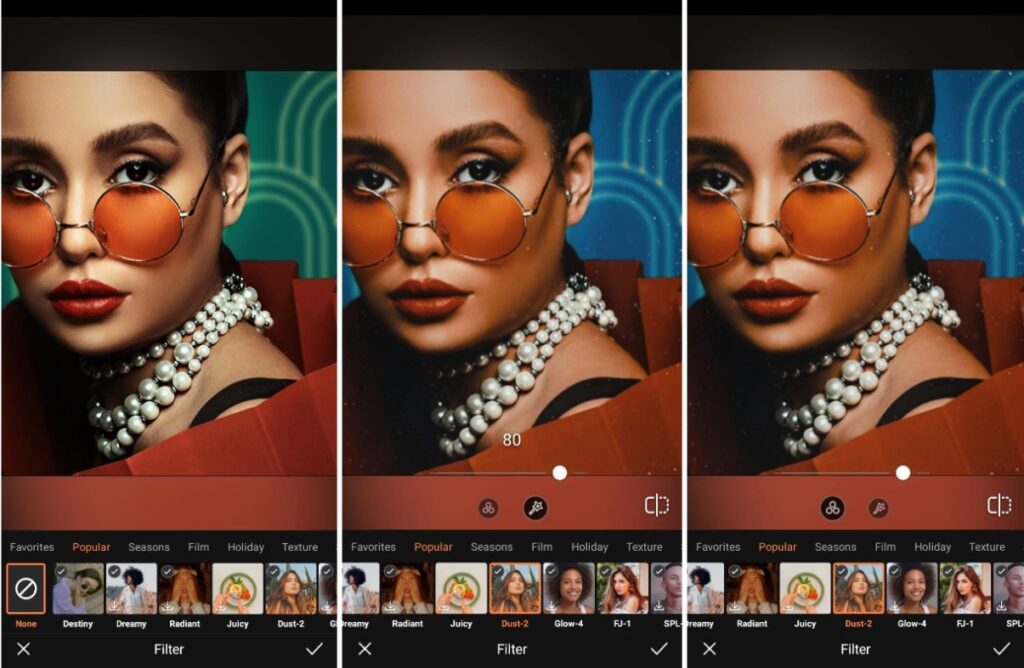
An easy way to make your jewelry photos a polished look is by applying a Filter. AIrBrush has 300+ filters that can deliver an overlay that will make your product photography look like it was edited by a pro.
- Go to the Filter tab on the main menu.
- Go to the tab on the main menu
- Choose the most suitable option to apply
- Toggle the intensity with the slide bar
- Tap the checkmark to save your edit
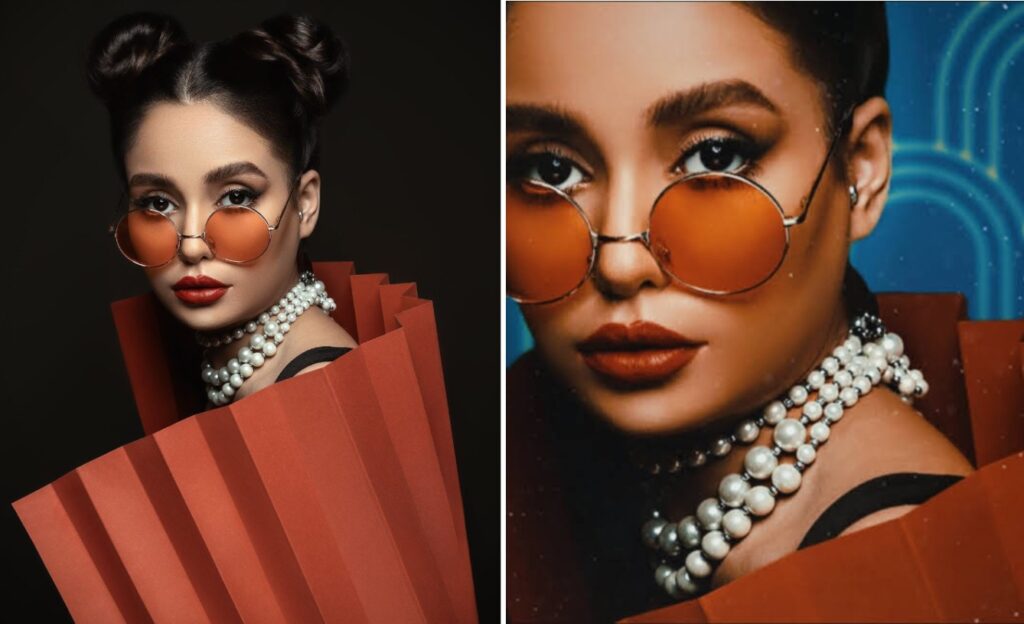
We want you to follow these same four to five steps to achieve the same effects for your jewelry photography. We’re confident that these product photography tips will yield results that you can’t wait to share. AirBrush, the easy photo editor, brings your visions to life, so once you’re ready to post, tag your posts with #AirBrushApp so we can have a look and then follow us @AirBrushOfficial for all our latest tips, tricks and hacks!
- How to Keep Photobombers out of your Photos - 03/11/2023
- 7 AirBrush Editing Tools for Influencers to Easily Enhance Their Photos - 03/11/2023
- 7 Tools for Easy Photo Edits with AirBrush - 03/11/2023


- How to Keep Photobombers out of your Photos - 03/11/2023
- 7 AirBrush Editing Tools for Influencers to Easily Enhance Their Photos - 03/11/2023
- 7 Tools for Easy Photo Edits with AirBrush - 03/11/2023