At AirBrush, we appreciate that both time and money are invaluable assets to entrepreneurs. Fortunately, our photo editing app makes it incredibly easy to create high-quality product shots all on your own – no professional photographers required! So, if you’re a small business owner looking to enhance your brand’s online presence keep reading, because in this post we’ll show you 3 simple ways you can use the app to make memorable visuals that stand out on social media. Always remember, a little effort in editing can go a long way in converting idle followers to loyal customers!
Details
When it comes to product shots, the devil’s in the details. That’s why we created the Details tool to enhance the finer elements in a photo. Whether you need to emphasize the texture in clothing or highlight the detailed metalwork in fine jewelry, all it takes is a few swipes with your fingertip to transform your products into works of art!


- Go to the Tools Tab on the main menu and select Details
- Swipe over the details in the product you want to draw out. Go over the area as many times as required.
- Tap the checkmark to save your edit.
- Pro tip: You can emphasize the effect even further by saving your first application and repeating the cycle in Details.
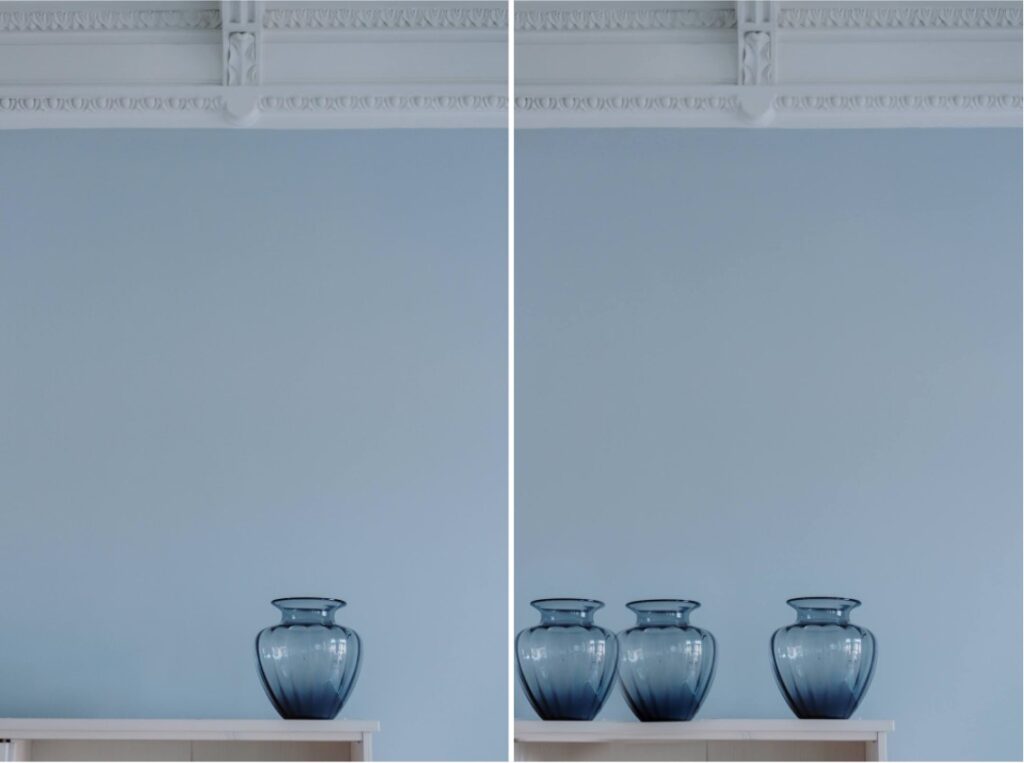
Stamp
AirBrush’s Stamp tool was made to clone any part of your photo and stamp it over an undesired area. As such, it’s ideal for removing unwanted elements. Conversely, it’s also the perfect tool to use if you need to replicate an object, making it that much easier to capture your product shots. Instead of shooting multiple items at once, you can capture an image of an individual product and replicate it in your photo in creative ways.
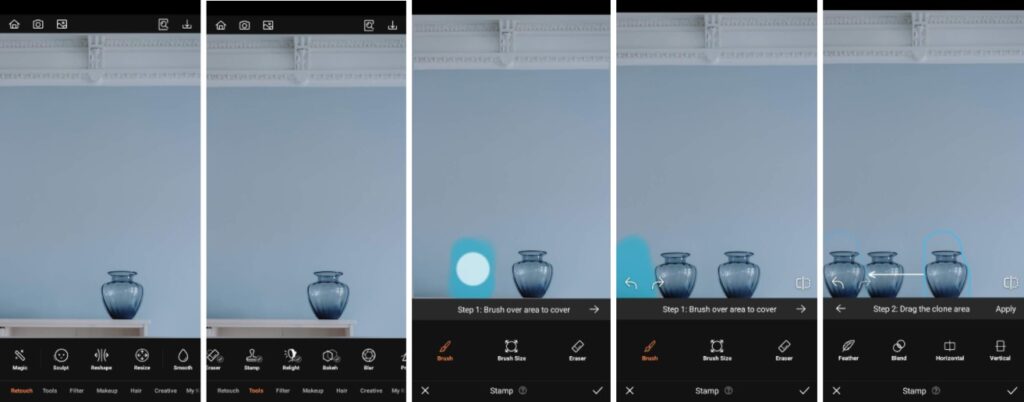
- Go to the Retouch Tab on the Main menu and select Stamp
- Swipe over and select the area you want to stamp over. Tap the right-facing arrow to move on.
- Select the area of the photo you want to stamp with
- Tap the checkmark to save your edit.
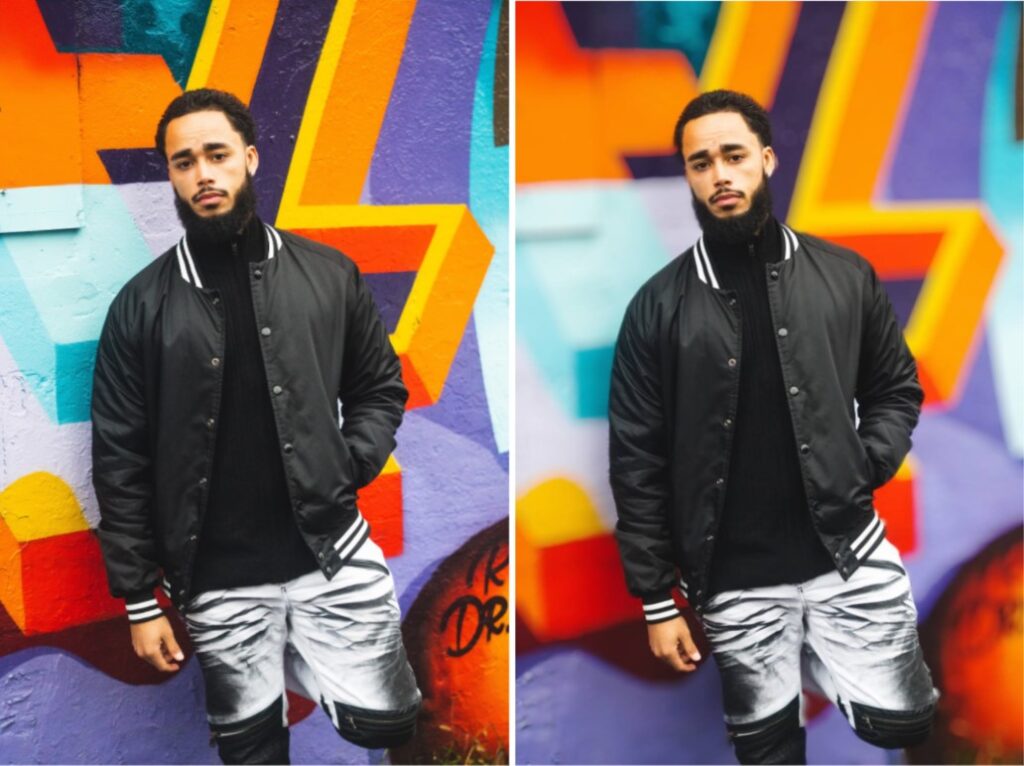
Bokeh
One sure-fire way to make your product stand out is to ensure it’s the only thing in focus. To create this effect in one click, look no further than Bokeh. Because it is automatically applied, you have the option to adjust the intensity of the Bokeh to a level that works best for your product shots. You can also adjust any over-application by using the Eraser to manually remove the effect from areas of the photo you want to remain in focus. Apart from just keeping all eyes on your product, however, Bokeh is always a great way to mask the details of an undesirable shoot location.
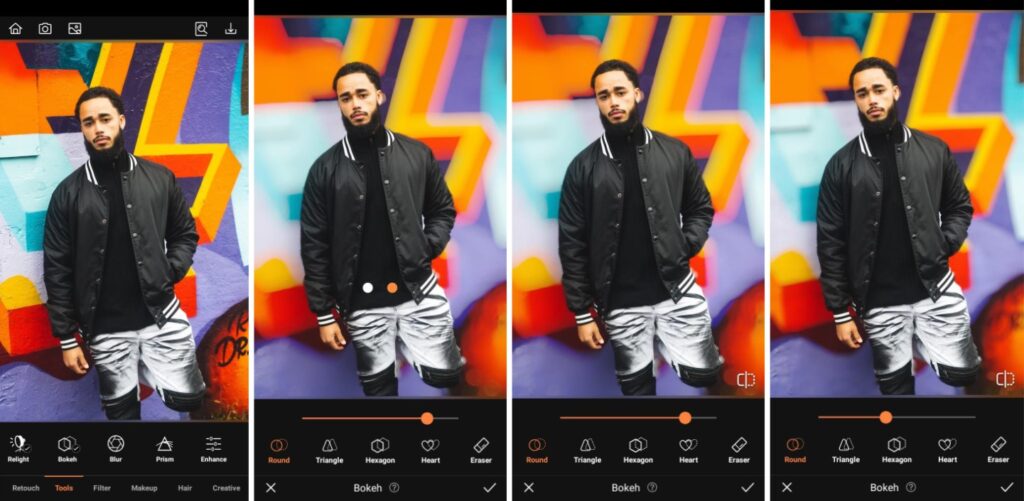
- Go to the Creative Tab on the Main menu and select Bokeh
- Toggle the intensity with the slide bar
- Use the eraser feature to correct any mistakes
- Tap the checkmark to save your edit.
See how easy all of those edits were? They took almost no time at all but completely transformed those photos, drawing the eyes straights to the subjects. Rest assured, AirBrush, the easy photo editor, is here to serve small businesses in impactful and time-saving ways, so get started making your product shots pop. We can’t wait to see them so use #AirBrushApp to tag your photos and follow us over on Instagram @AirBrushOfficial for more tips and tricks to help improve your brand!
- How to Keep Photobombers out of your Photos - 03/11/2023
- 7 AirBrush Editing Tools for Influencers to Easily Enhance Their Photos - 03/11/2023
- 7 Tools for Easy Photo Edits with AirBrush - 03/11/2023


- How to Keep Photobombers out of your Photos - 03/11/2023
- 7 AirBrush Editing Tools for Influencers to Easily Enhance Their Photos - 03/11/2023
- 7 Tools for Easy Photo Edits with AirBrush - 03/11/2023