The world is opening back up and with that comes a lot more travel and travel photos to edit. In case you’re out of practice, AirBrush has put together a simple edit using some essential tools to get your #flightsnotfeelings vibes back in full swing. Follow the steps to create your own #wanderlust edits and inspire your followers to do the same.
Enhance
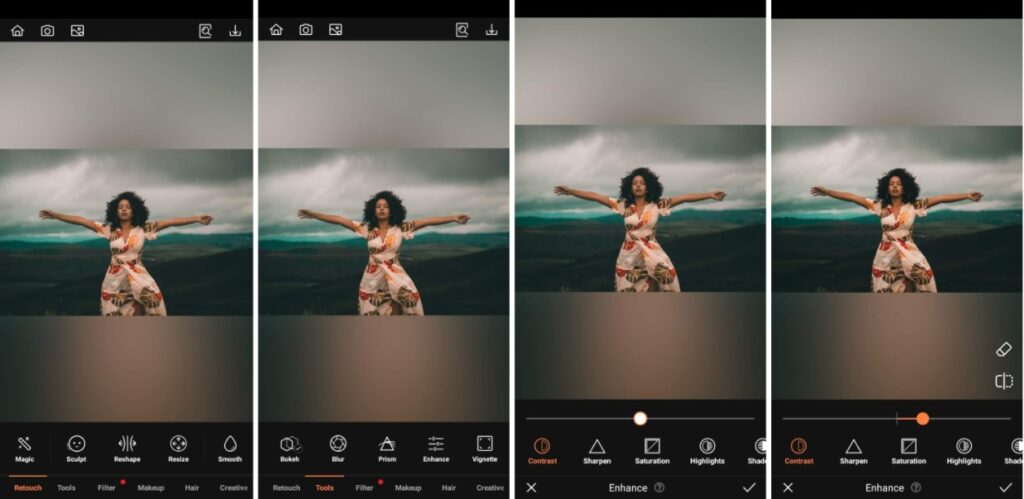
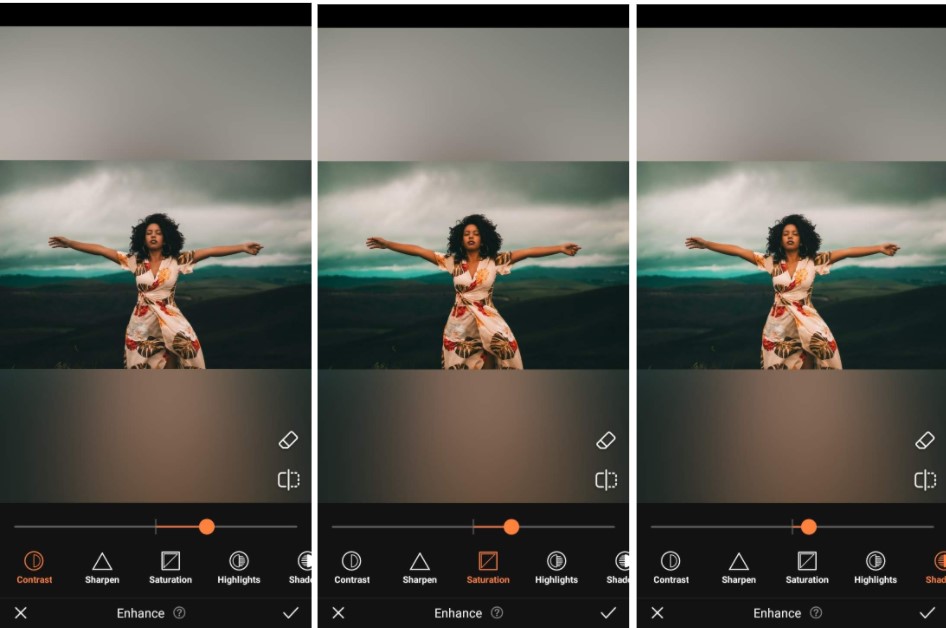
Enhance takes you back to basics with the fundamental editing tools we all started out with including Brightness, Saturation, Contrast, just to name a few. And a basic tool like this comes in very handy, especially for phone camera photographers. If you don’t have the time or equipment necessary to maximize your shots, it’s best to start with a simple tool to highlight the elements in your travel photos.
- Go to the Tools Tab on the Main menu and select Enhance.
- Scroll through the options to manipulate the photo.
- Adjust the intensity of the effect by using the slide bar.
- Tap the checkmark to save your edit
Crop
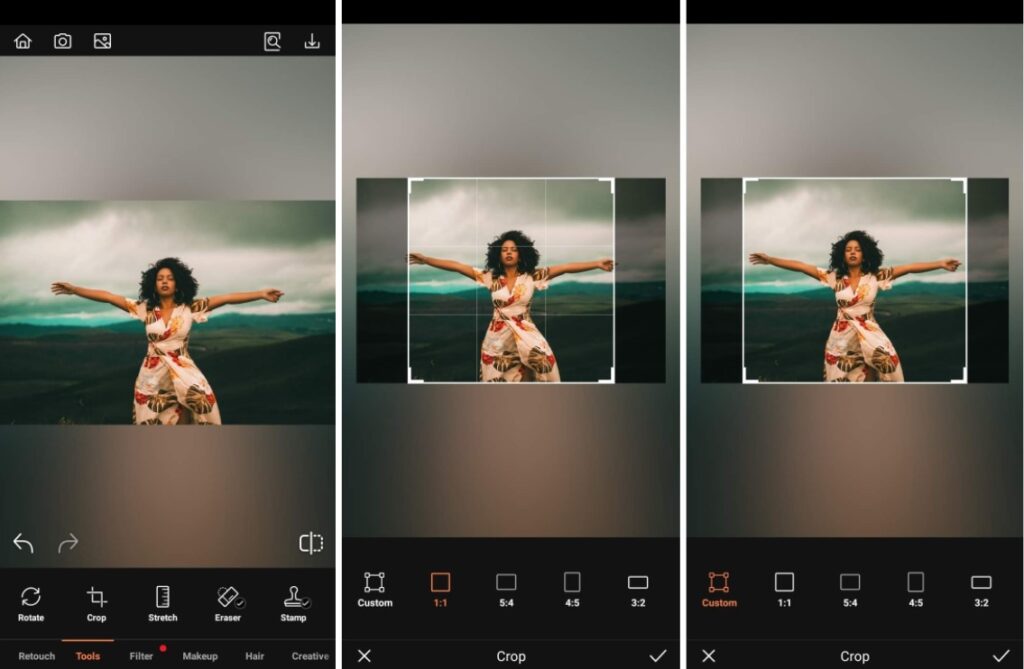
One of the major obstacles for travel photos is the unintentional capture of photobombers or some unwanted facade ruining the tone of the shot. To help get you past that in your travel photos, use the Crop tool to eliminate unwanted elements. It’s as easy as sliding your finger across the screen. Choose from preset crop ratios or go for a custom crop.
- Go to the Tools Tab on the Main menu and select Crop.
- Choose a preset crop ratio or shift the crop lines for a custom crop.
- Tap the checkmark to save your edit
Stretch
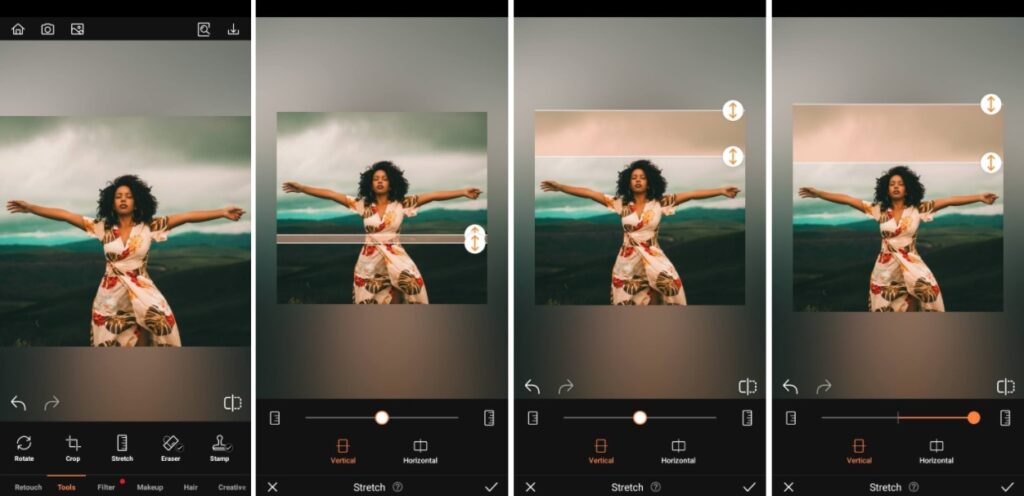
You may find that you want to enhance a photo with a contraction or expansion that can help give a better perspective to your travel photo. The Stretch tool allows you to vertically or horizontally expand or contract sections of your photo to improve the aesthetic scale of the pic.
- Go to the Tools Tab on the Main menu and select Stretch.
- Select Vertical or Horizontal Stretrch and adjust the width of the section you want to manipulate.
- Expand or contract the chosen section by moving the slide bar right or left respectively.
- Tap the checkmark to save your edit
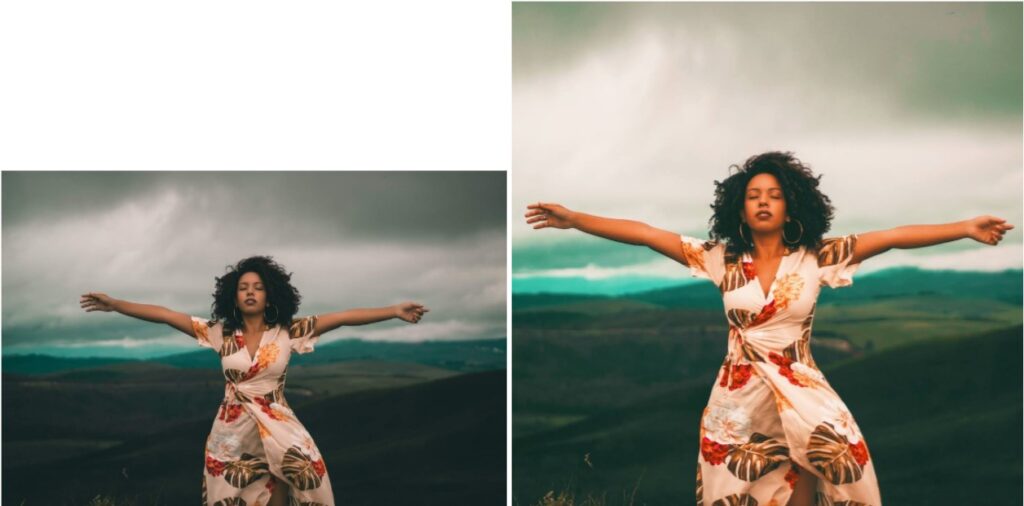
Filter
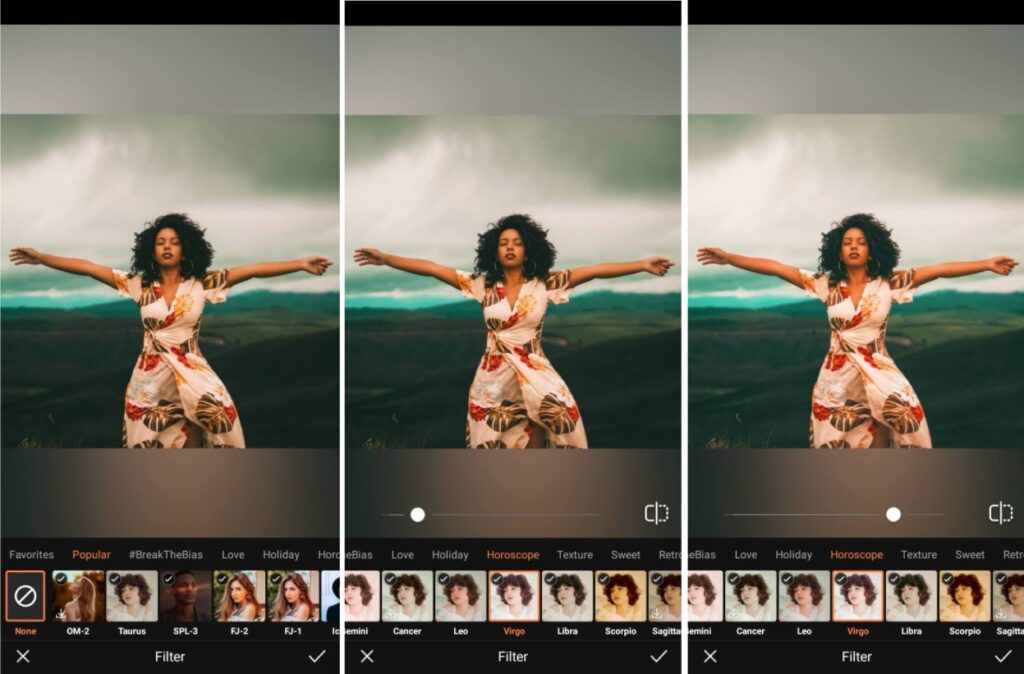
An AirBrush Filter is our favorite last step and they work perfectly with travel photos. We’ve got scores of options that you’re bound to find the perfect one to convey the same feeling you had when you were traveling. Whether you’re in the market for something lush and saturated or dark and moody, there’s a filter for every pic you edit.
- Go to the Filters Tab on the Main menu.
- Scroll through the Filters selection. We’re using FJ-1here. Narrow down your choices by choosing a category.
- Adjust the intensity of the effect by using the slide bar.
- Tap the checkmark to save your edit
Once you get your photos uploaded to AirBrush these simple steps are all you need to get your travel photos looking their best. Rely on AirBrush, the easy photo editor, to always have the simplest and most impactful tools to edit your photos. Once you post, we can’t wait to see them so use #AirBrushApp to tag your photos so everyone can find them. Then follow AirBrush over on Instagram @AirBrushOfficial for our latest tips, tricks and hacks!
- How to Keep Photobombers out of your Photos - 03/11/2023
- 7 AirBrush Editing Tools for Influencers to Easily Enhance Their Photos - 03/11/2023
- 7 Tools for Easy Photo Edits with AirBrush - 03/11/2023


- How to Keep Photobombers out of your Photos - 03/11/2023
- 7 AirBrush Editing Tools for Influencers to Easily Enhance Their Photos - 03/11/2023
- 7 Tools for Easy Photo Edits with AirBrush - 03/11/2023