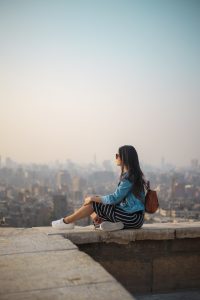
Before full-colored pictures were available, all the photos were printed either black and white or sepia.
There is a neat extra section of filters in the AirBrush app that you might not be aware of. When you scroll through the Filter section, you’ll notice there are a few already there. Though, if you look closely, right at the end is a button with a plus sign that will take you to different options. We want to share with you a filter on this list that we have not talked about before, but it is a common color-option.. black and white!
One by One
To begin, download the B & W package. Once it is displayed on the list of filters, you will see seven different filters under the tab. We’ll give you some brief info on how each of these can make your picture look and which you could combine with other tools in AirBrush.
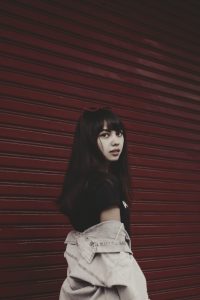
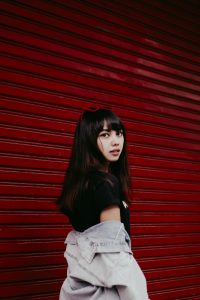
- Film: Clear reason why this is the first option, it was the original printing tool when the camera was invented.
- Slide the cursor to #100 to give it the full color. The lighter, the less you will see the effect, it kind of defeats the purpose of the filter.
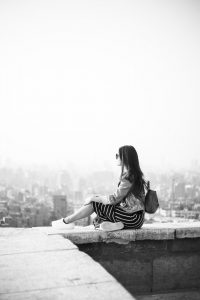
- Classic: The simpler, the better. The only difference from Film is the brightness of the background.
- Use #100 of the color and the Vignette tool to give it a more vintage final-touch.
- Noir: The more you increase the number, the more the filter intensifies the pigmentations of your photo, and this does not always look well.
- You can apply the effect to about #85 and still have a fantastic color to your picture!
- Once the filter is applied, head over to the “My Look” tool under the Makeup section. Apply the lip color of your choice. Here we chose Bloom.

- Timeless: Imagine that with each of these filters, you are slowly moving towards a different time, just like the evolution of picture printing did. In other words, we begin to see more color even if it’s within the range of the color black.
- A #45 will begin to slide into a brow-ish hue yet still keeping the original colors.
- An #85 or above will begin to remove those shades of brown and into a more pigmented image. Either is a perfect choice!
- Rustic: Think of it exactly as the meaning of the word. Depending on the original colors of your picture, you can decide how much to apply this filter.
- We decided to go a little over halfway to keep some of the original reds to turn them into shades of brown.
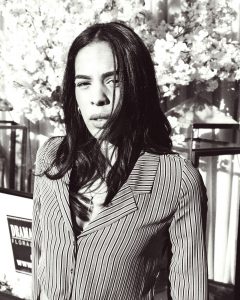
- Sepia: A worldly used tone effect known for its reddish-brown shades.
- Another filter that its best used if at its full-color, go all the way to #100 and make those photos look classically-old.
- Finish off with the Bokeh tool.
- Nostalgia: Intensifies light tones into a whiter color and creates either greyer or darker backgrounds. Again, it depends on the color of the picture that will help determine what level of the filter to apply.
- Only apply half the filter for really bright pictures.
- Full way or close to if the image has light and warm colors.
- Apply less than #50 if the picture has dark and intense tones.
An important tip is if you want to edit the picture with other tools in Airbrush such as Acne, Reshape, or Resize, you should do it before you apply any of the filters in the B & W package.
Don’t forget to tag us once you have uploaded your edited pictures @airbrushofficial ?
- 10 Tips to Achieve the Perfect Picture with AirBrush - 03/11/2023
- It’s Scorpio Season! - 02/11/2023
- Brush it out! - 31/01/2020


- 10 Tips to Achieve the Perfect Picture with AirBrush - 03/11/2023
- It’s Scorpio Season! - 02/11/2023
- Brush it out! - 31/01/2020