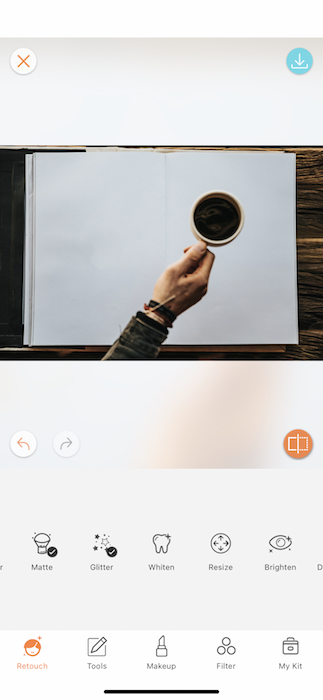
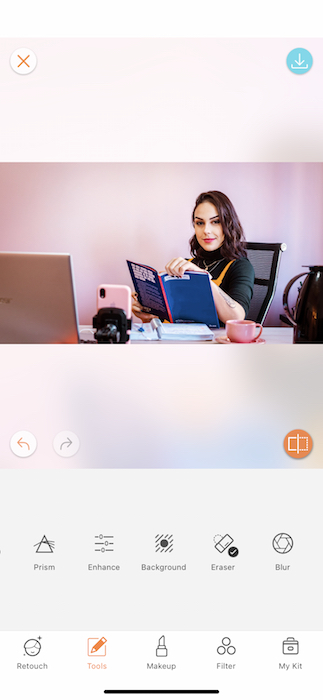
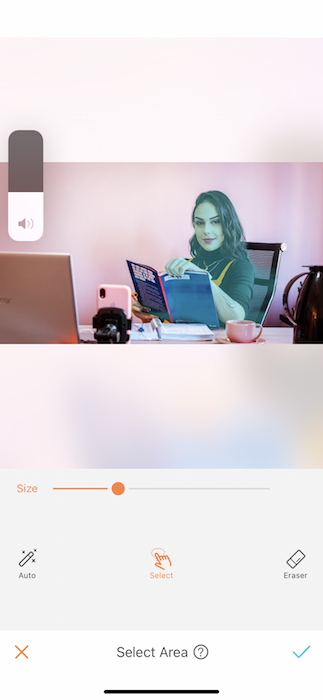
In the words of the incomparable(s), Fifth Harmony, You don’t gotta go to work, work, work. More and more offices are moving into our very own homes and while this may bring the comfy vibes we don’t need to sacrifice the #aesthetic to get there. Guess who has the answer to the age old conundrum of the perfect #wfh (work from home) selfie? That’s right. Airbrush does! So get your lumbar support cushion and your cutest coffee mug. It’s time to create the perfect work from home selfie!
A clean space is a good space

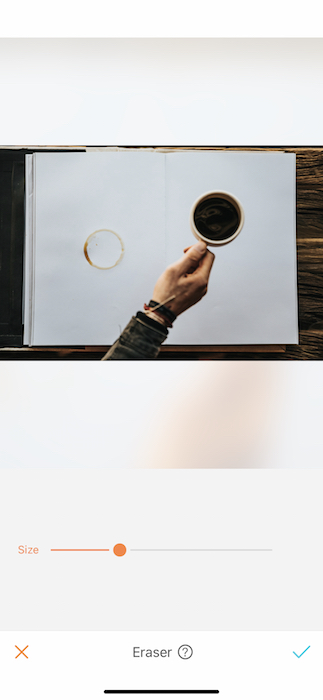
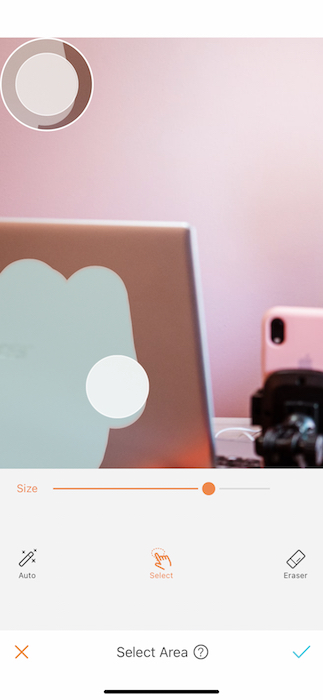
No one’s arguing that cleaning isn’t good. It’s great, it’s responsible, it’s adult. However, sometimes we miss a lil spot here or a lil dust there. It makes it even worse when that spot makes into your #wfh pic. Don’t let the virtual office know that you missed a cleaning day and use the Airbrush Eraser Tool! So you got a lil something to clean up? Tap the Eraser Tool from your Tool Tab. You’ll instantly see the option to adjust the brush size. Use the toggle to determine how big the brush needs to be for your cleaning job.
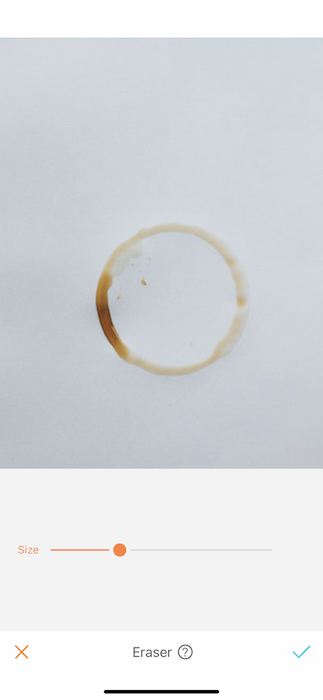
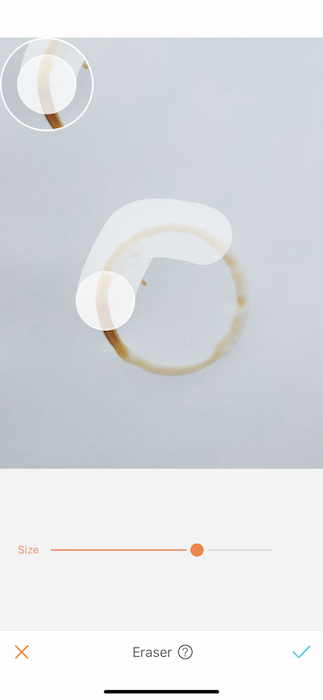

Zoom into the space you’re working on to ensure you get all the details. Slowly start to brush through the unwanted blemish until it’s disappeared. The Eraser Tool works by spreading the surrounding pixels so it might take a few tries to get it just right. Once you’ve eliminated all the dirty invaders you can zoom back out to check your progress.
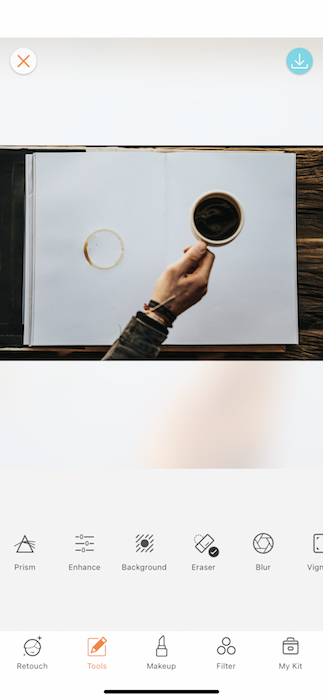
You’ve done it! Now this desk could still use a little work… How about we bust out the Whiten Tool!
White out

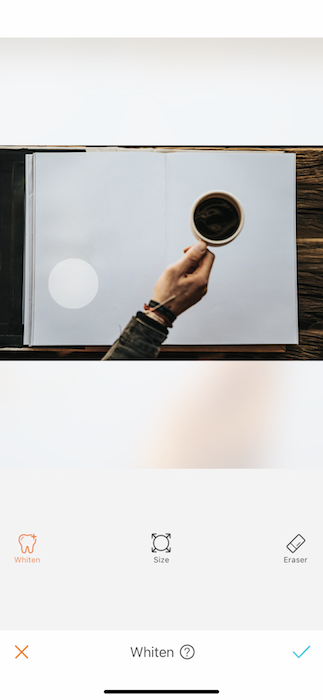
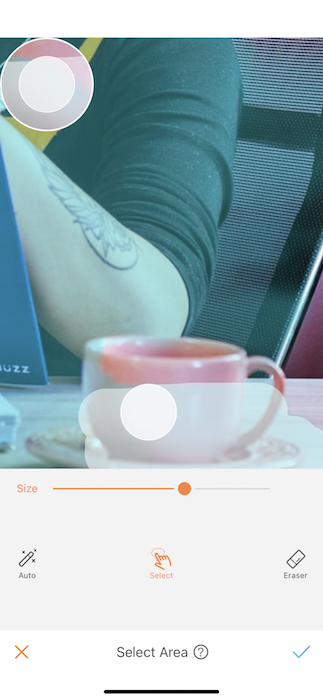
Are those tears of joy now that you know Airbrush has a tool that whitens any surface to clean perfection? You’ll find this bad boy in the Retouch Tab. There you will see a tiny tooth logo. Tap the tiny tooth to open the Whiten Tool. Just like the Eraser Tool you’ll find the Brush size adjustable by moving the center toggle.
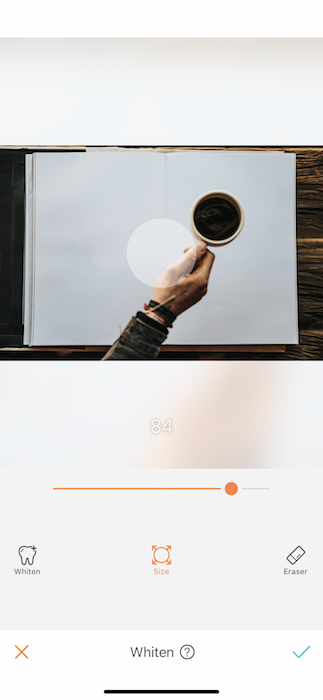

The brush size is crucial to a job done right. Just like having the right tools to #wfh. A large brush size may help Whiten entire background, removing any scratches or stains on a backdrop. Or you can use the small brush to whiten your teeth. The sky’s the limit!
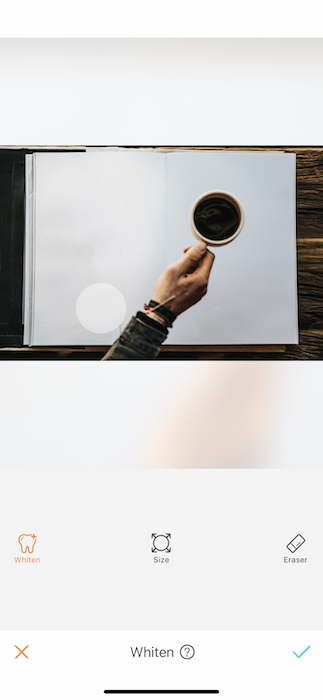
Notice how beautifully clean the surface looks with the one two punch of Eraser & Whiten. Keep brushing away and soon enough…


Who’s the most put together member of the #wfh team? THAT’S YOU!
Out of the office
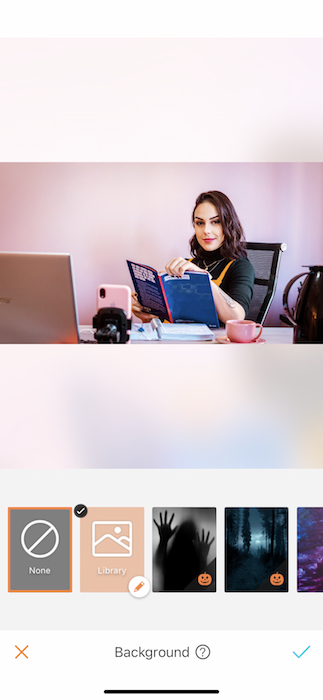
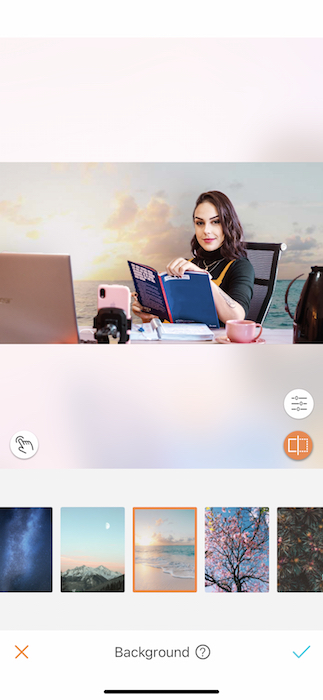
#Wfh can have it’s benefits but sometimes walking up and sitting in the same space all day can get played out. Why not take yourself somewhere incredible? No flight required. The Background Feature allows you take yourself anywhere in the world, ney, the galaxy! Open up your Background Feature by going to your Tool Tab.
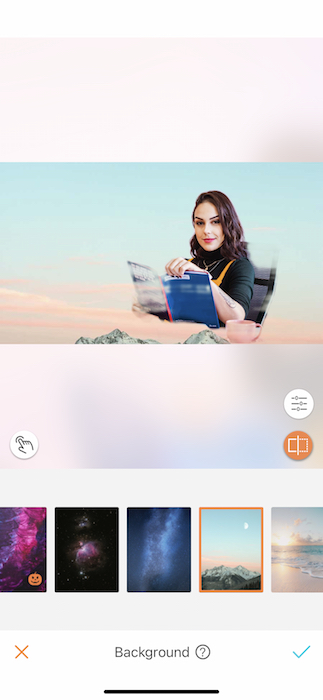
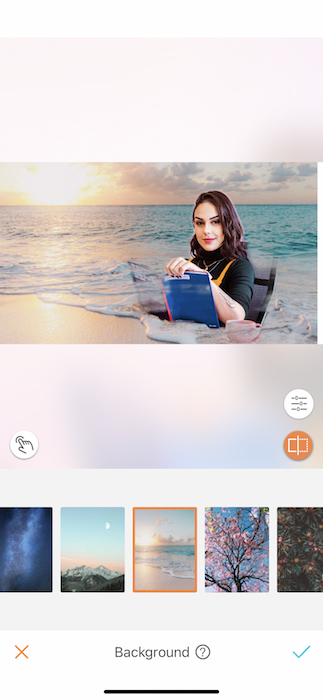
Once you start tapping on the different Backgrounds you’ll see them automatically transport you from the mountain tops to the milky way. Today we thought we’d do a classic get away and take you to the golden sands of a beach sunset.
You will notice that the image may not have the cleanest edge or it’s cutting certain aspects out that we still want to see. Tap the adjustments button the bottom left and you’ll see the selected area appear in blue. You can then use the Select feature to brush across all the surfaces you’d like to maintain above the Background.
It will help to zoom in and make sure you get each corner and line as best you can. If you see yourself go outside the lines just tap the Eraser to clean up your mess.
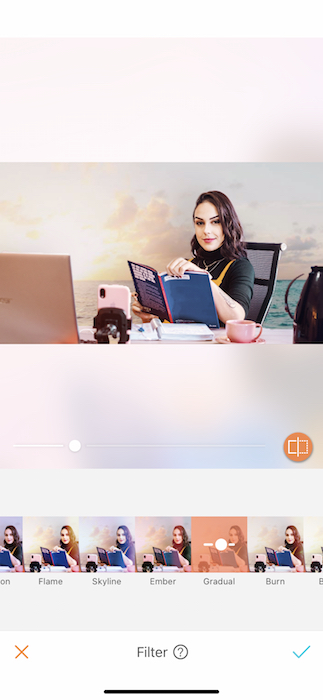
BAM! Now you’re backdrop is perfectly set! We don’t like to end a hack around here without the perfect Filter. We threw in the Gradual Filter from the Afterglow Filter Pack.


They say the home office is where the heart is and ours is obviously on the beach.Ready to start your shift? Make sure to upload your Airbrush edited pictures and tag #AirBrushApp on Instagram to be featured on our profile, @AirBrushOfficial.

- AirBrush Premium Feature: Sculpt - 03/11/2023
- Make the most of the Sculpt tool this Holiday Season - 02/11/2023
- How it’s Started, How it’s Going. Get that Glow Up! - 30/03/2021


- AirBrush Premium Feature: Sculpt - 03/11/2023
- Make the most of the Sculpt tool this Holiday Season - 02/11/2023
- How it’s Started, How it’s Going. Get that Glow Up! - 30/03/2021